Adding data to a folder
To add data to a folder, click on the folder name. Click the button  .
.
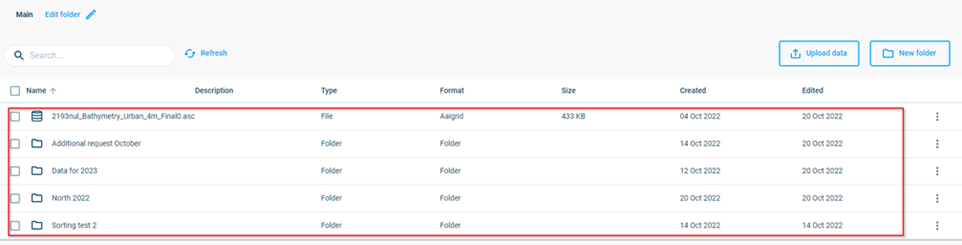
It is also possible to drag a file across the bottom of the screen in the red area selected below and drop it there to get the same pop-up.
In the pop-up, click to browse the files and select the one you want to upload.
After you select a file, you will be prompted to select to upload the file ‘as-is’ or to use some form of conversion. This will be covered in the next paragraphs.
Importing a file as-is
To import a file as it is, choose the option ‘Upload as-is’ in the pop-up. Note that this should only be used for data storage.
Note: Most of the data that should be used in other Cloud Applications usually has some requirements that mean a conversion is needed. Upload the file through the application or check the documentation to make sure the file is uploaded correctly. Click Upload.
Uploading the file consists of 2 automatic steps. The first step is an upload step where data is uploaded from your local drive to the platform.
Note: During this step, do not close the browser. This will interrupt and stop the data transfer.
The second step is an import step where data is transferred within the platform to your folder. During this second step, it is safe to close the browser.
You can see the progress in the top bar and progress spinners.
Once you have uploaded the file, you will see it appear in the folder.
Importing and converting
This option in the pop-up gives you the option to make conversions from one file-format to another, to add some metadata to the file or to generally adapt information before the file is uploaded.
Pick Upload and change or convert. This will open the Upload and convert pop-up:
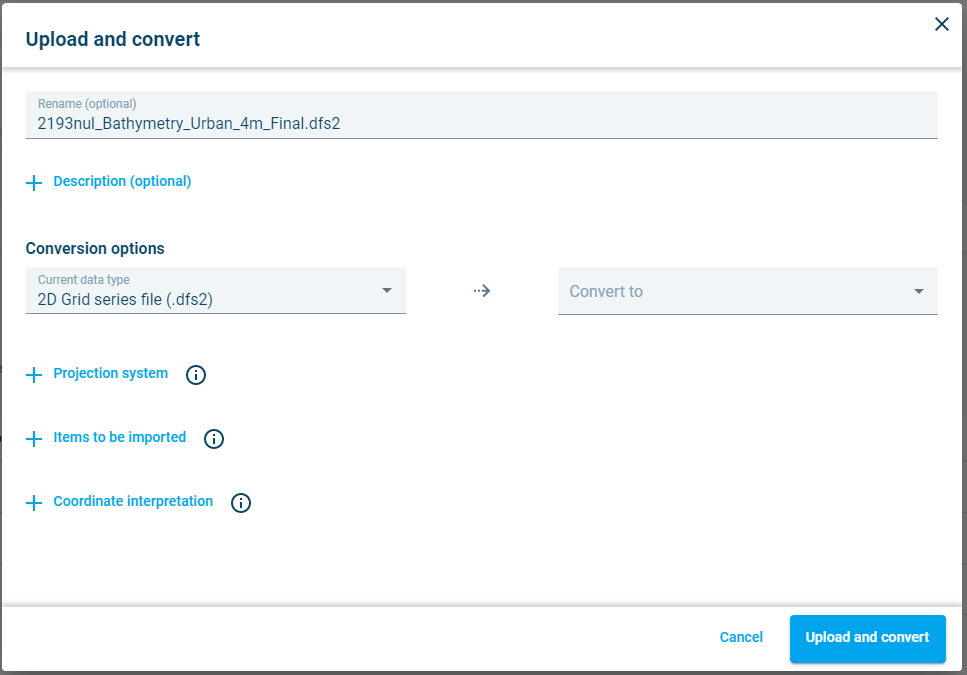
Usually, the Cloud Admin will recognize the file type you are trying to upload and fill the ‘Conversion options’ dropdown on the left with the file type it has found. If it is not filled, have a look at the available options and see if the type is listed. If it is not listed, this file type is currently not supported. Contact Customer Service (mike@dhigroup.com) if this is an issue.
On the right side is the Convert to field, which will indicate what the file will be uploaded as once the process finishes. Most Cloud applications require you to specify the projection system, so click the + and type the code in the field to specify the correct one. Not all projection systems are supported, so if you can’t find it in the field, contact Customer Service (see above) if this is an issue.
Other items in this pop-up are for specific, advanced use and should only be used once the Platform team has indicated it to be required.
Importing a file as a multidimensional dataset
To import a file as a multidimensional dataset, choose the file you want to import and then choose the correct file type.
Then choose to save your file as a multidimensional dataset.
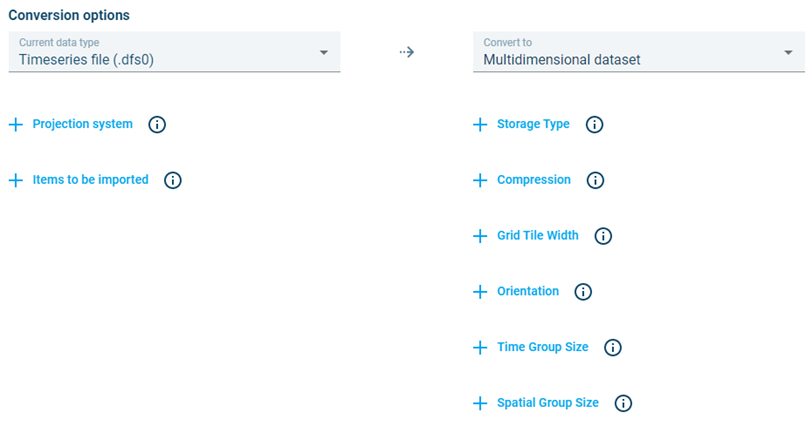
Optionally you can specify coordinate system or define parameter options if needed and then click Upload and convert to continue.