Defining the Project
First step in using DHI PlumeCast is to create a Project. When you login for the first time, and have no project defined, you will be directed to the ‘Project Manager’ page in which you can create your first project.
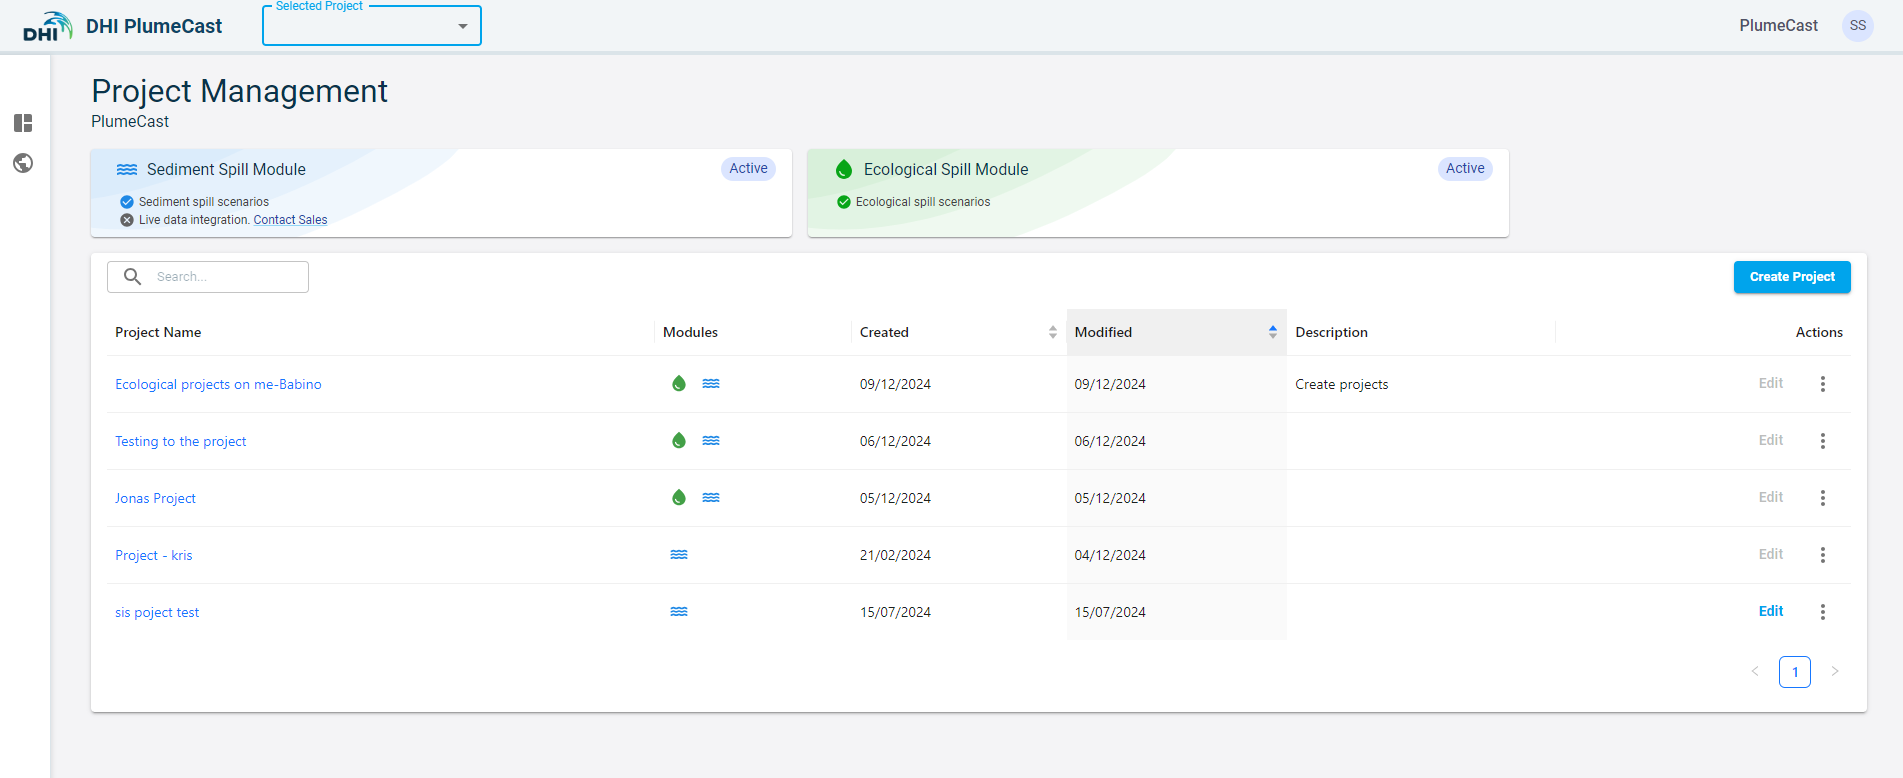
Click on ‘Create Project’ button on top right corner of the page.
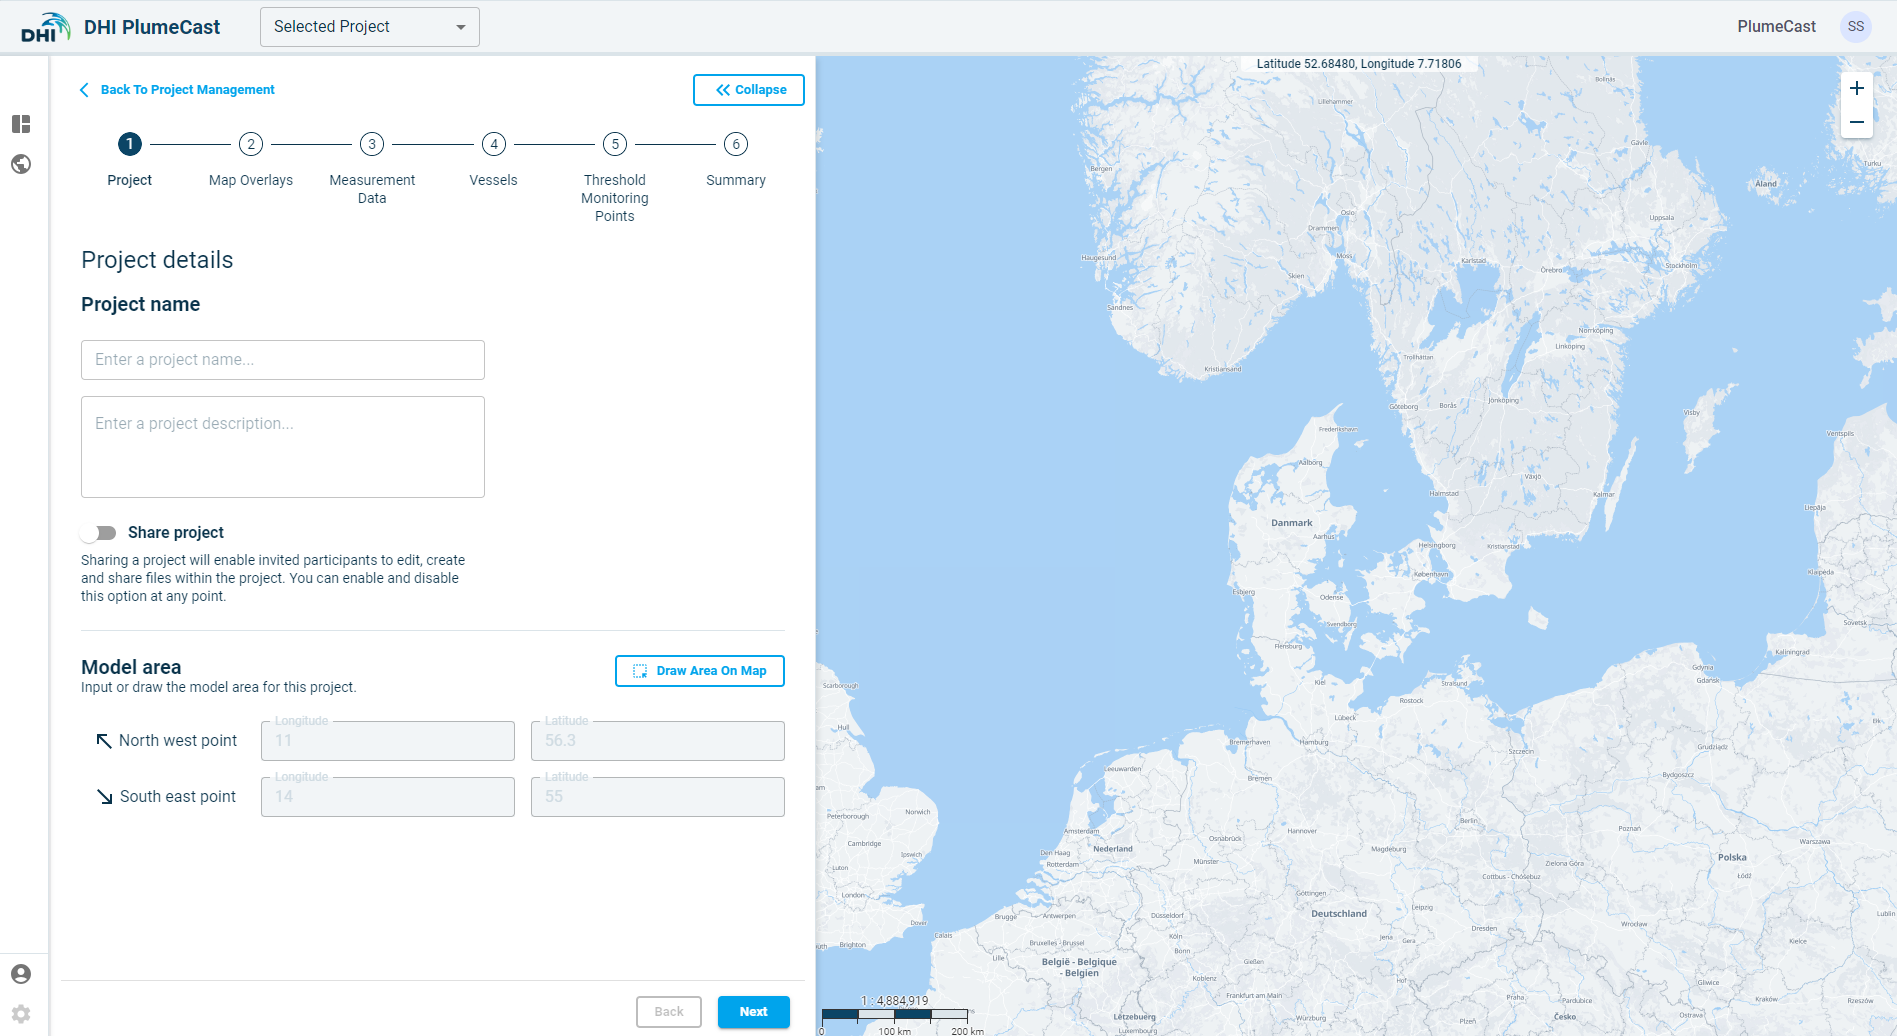
In the first step, you should give a name to the project and a short description.
Your project by default is set to ‘‘Private’’, which means only you have access to the project and the scenarios within it. You can enter project description and set it as ‘‘Shared’’ by toggling the ‘Share project’ option.
If you set the project to ‘Shared’, the project will be visible to all other users within your company who have access to DHI PlumeCast. They will only have read access, meaning that they can use your project to define scenarios and visit the Monitoring section, but without any editing possibility. Finally, you can define the default map location corresponding to your project site.
Map Overlays
The next step in project definition is to add map overlays to your project. Map overlays are shapefiles which you would like to over lay on your map and/or on your scenario results visualisation. The map overlays added to a project can be used while working on scenarios (creating/editing scenario or looking at scenario results) which belong to the project.
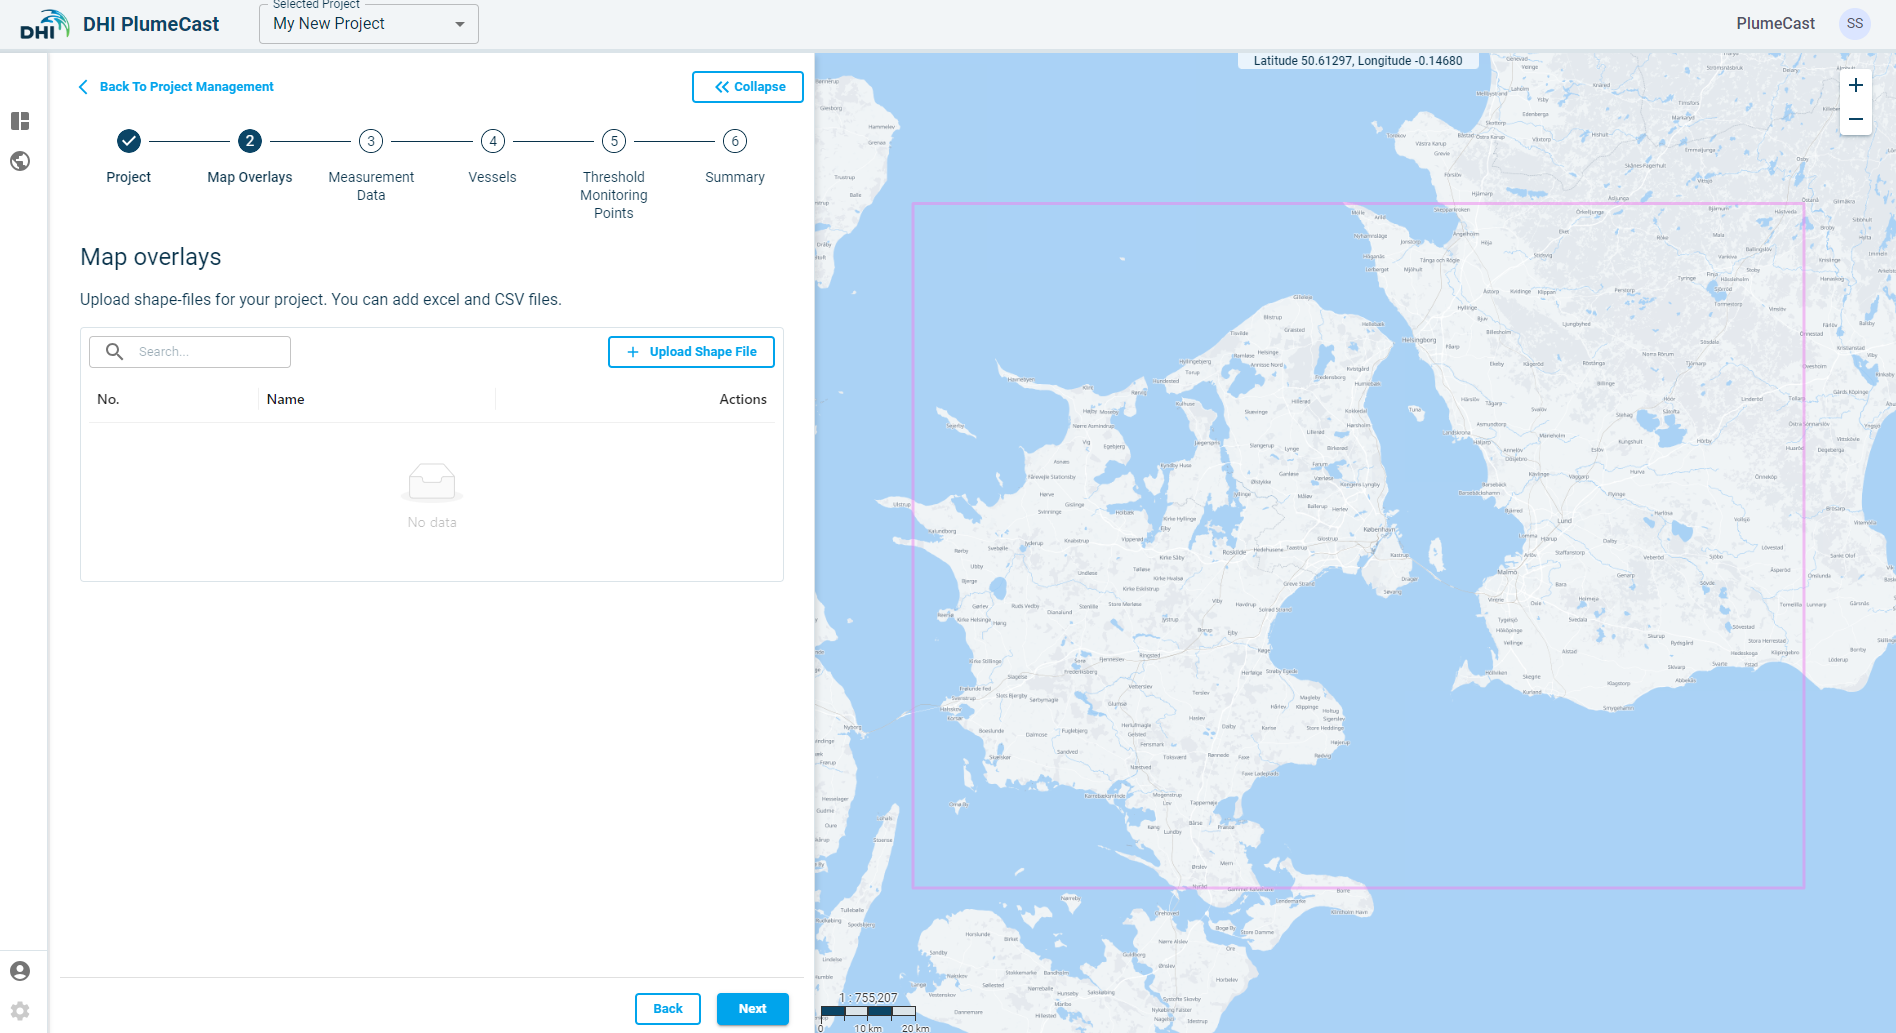
Click on ‘Upload Shape File’ button to add a map overlay to your project.
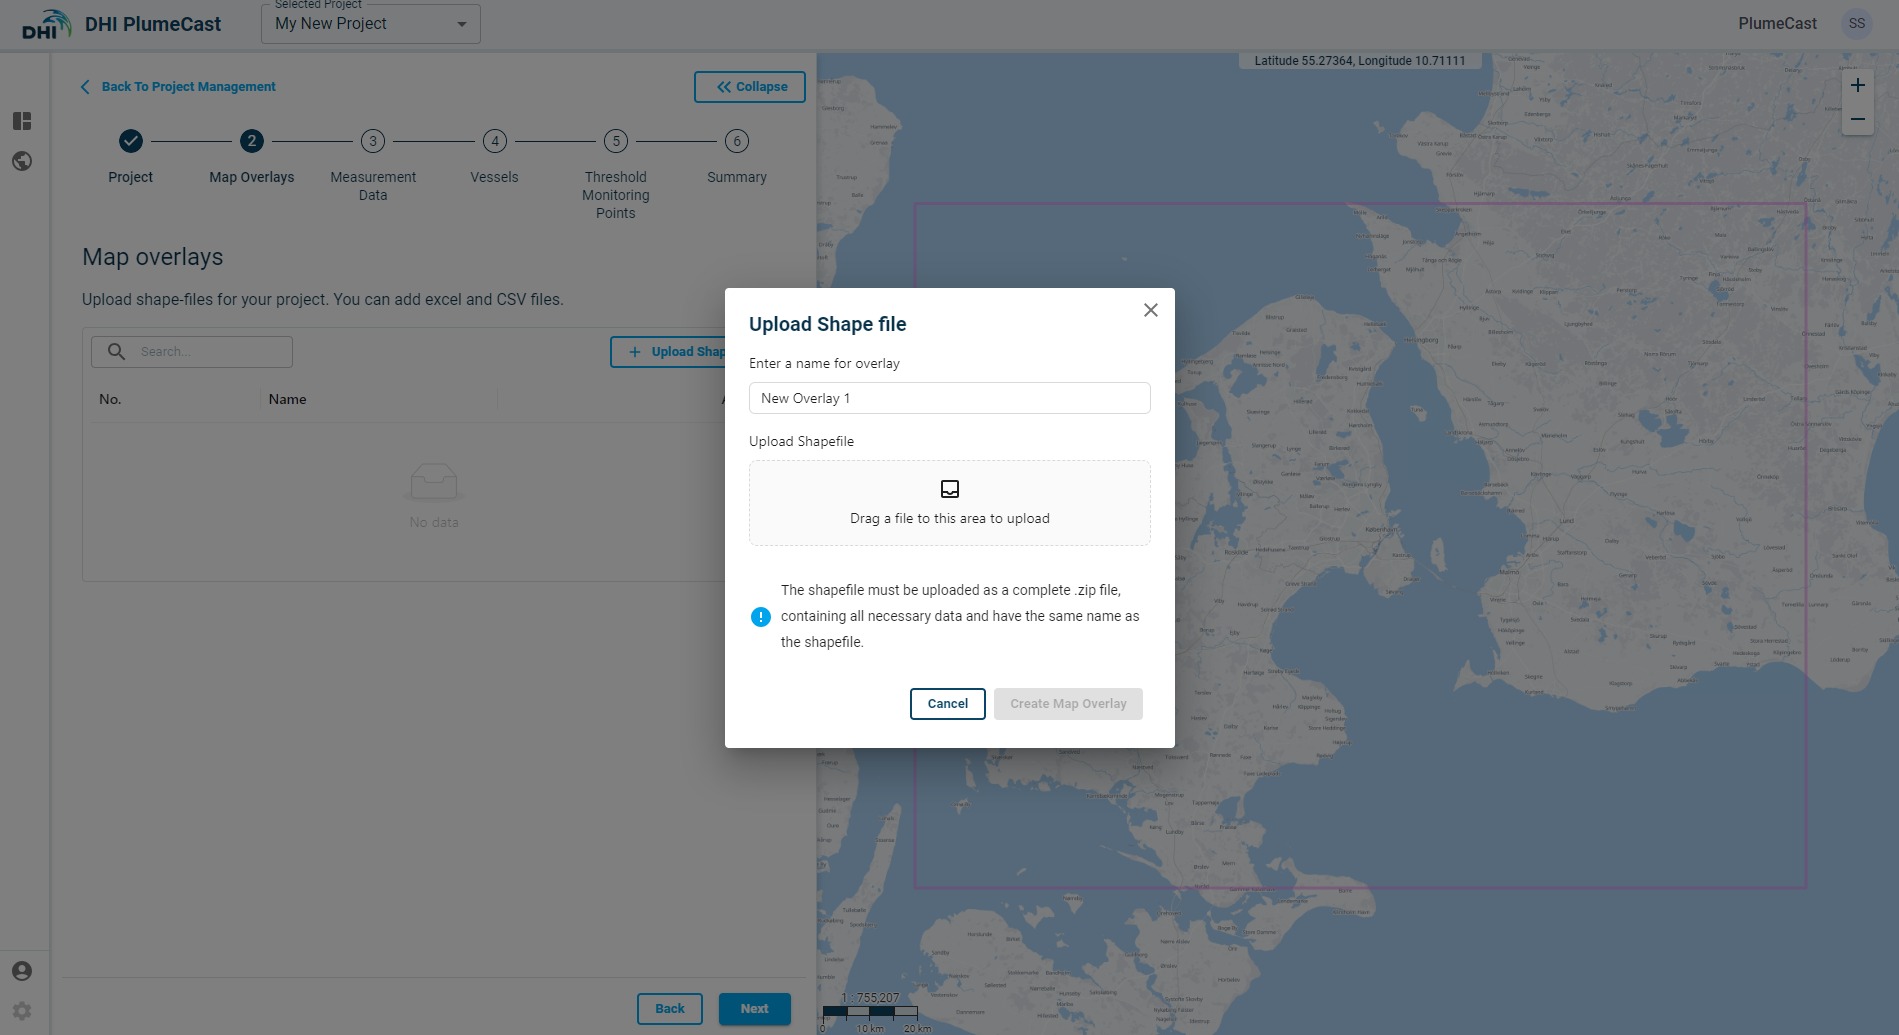
As written in the message box, when preparing the shapefile to upload, all the shapefile files components must be stored in a folder with similar name and uploaded as a .zip file.
Currently, the following types of shapefiles are accepted in DHI PlumeCast:
- Point (single point/multipoint)
- Line/Polyline
- Polygon
After a successful upload, your shapefile appears in the list of map overlays, where you can edit or delete it. The project map overlays can be visualised on the map on right panel.
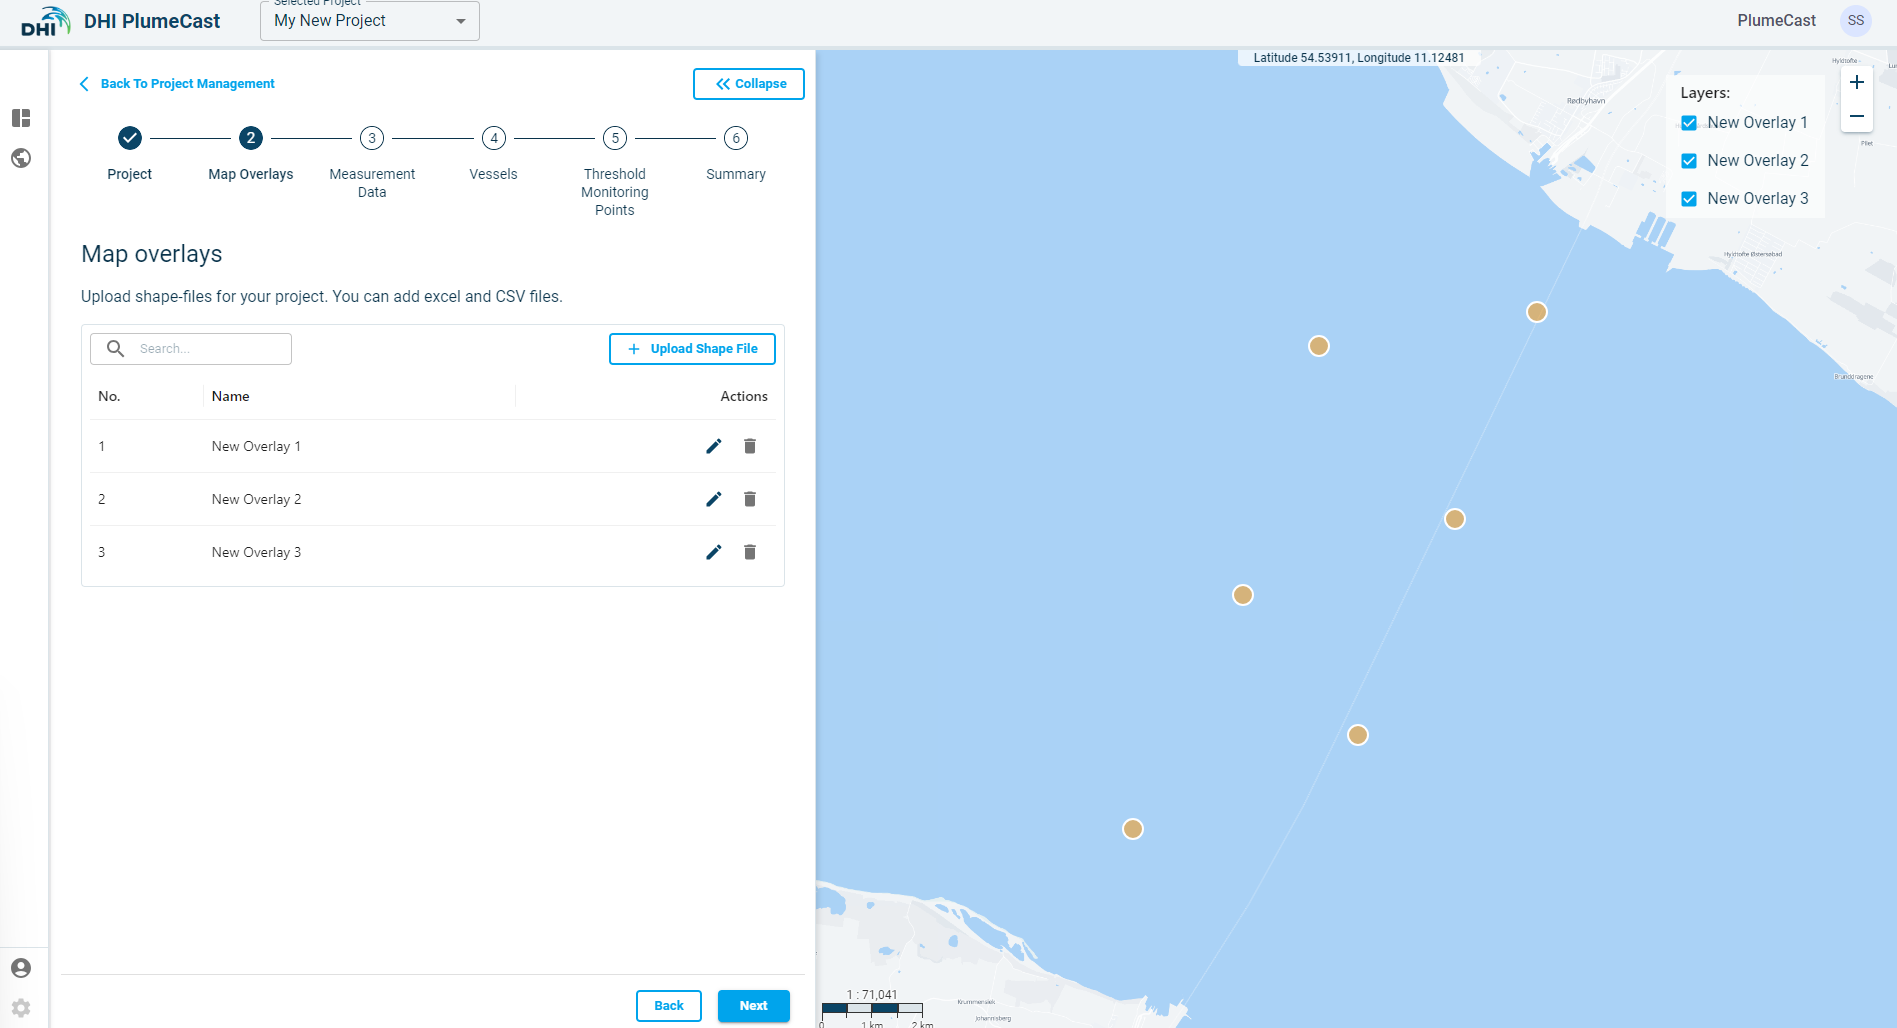
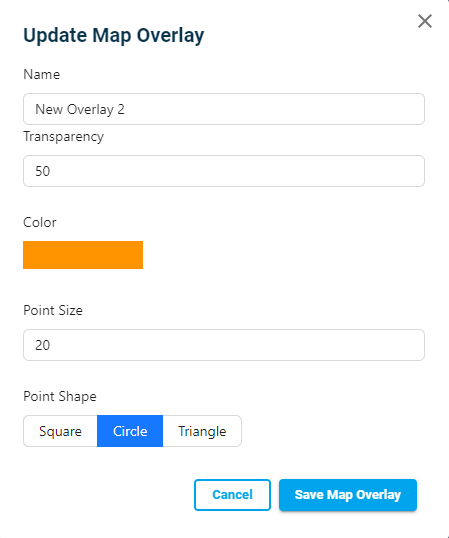
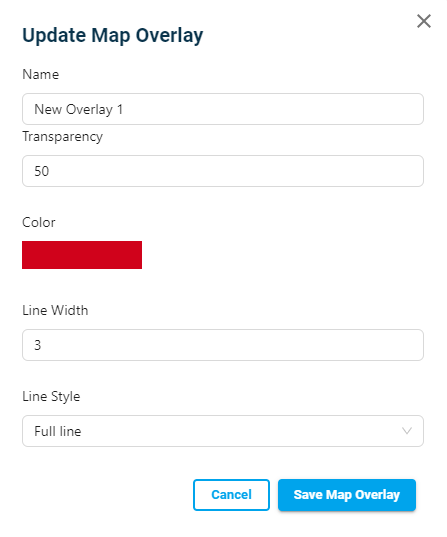
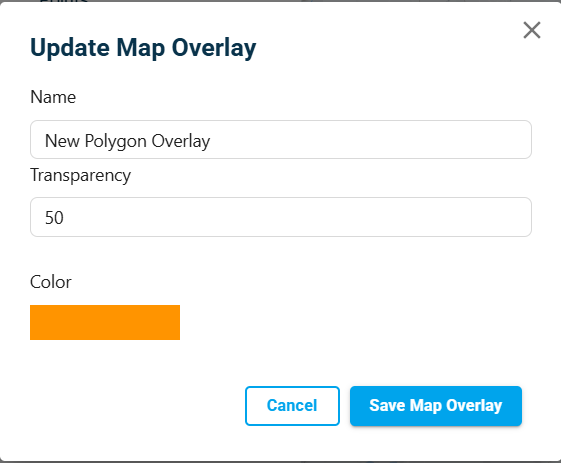
Map overlays can be edited, where you can change the colour and transparency of the shapefile.
If the map-overlay is a point, you can change the size of the point, and the shape of the point to be shown as a circle, triangle, or a square on the map:
If the map-overlay is a line, you can change the line thickness, and the line style to be continues (full line) or dashed line.
If the map-overlay is a polygon, you can change the polygons colour and transparency.
Measurement Data
Only active with Live Data access.
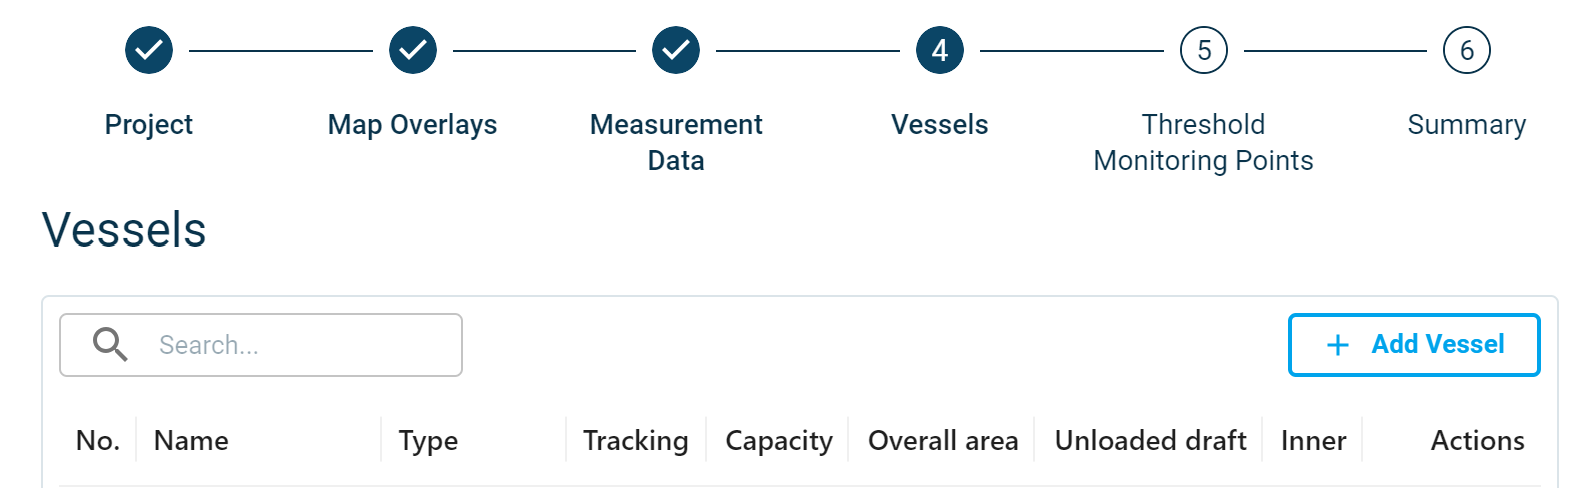
Vessels
In this step you can add different types of vessels required in the project. The added vessels can then be used for Dredging and Disposal in scenarios, or for live tracking in the Monitoring map when using DHI PlumeCast with access to Live Data.
Click on ‘Add Vessel’ button to begin defining a new Vessel property in your project.
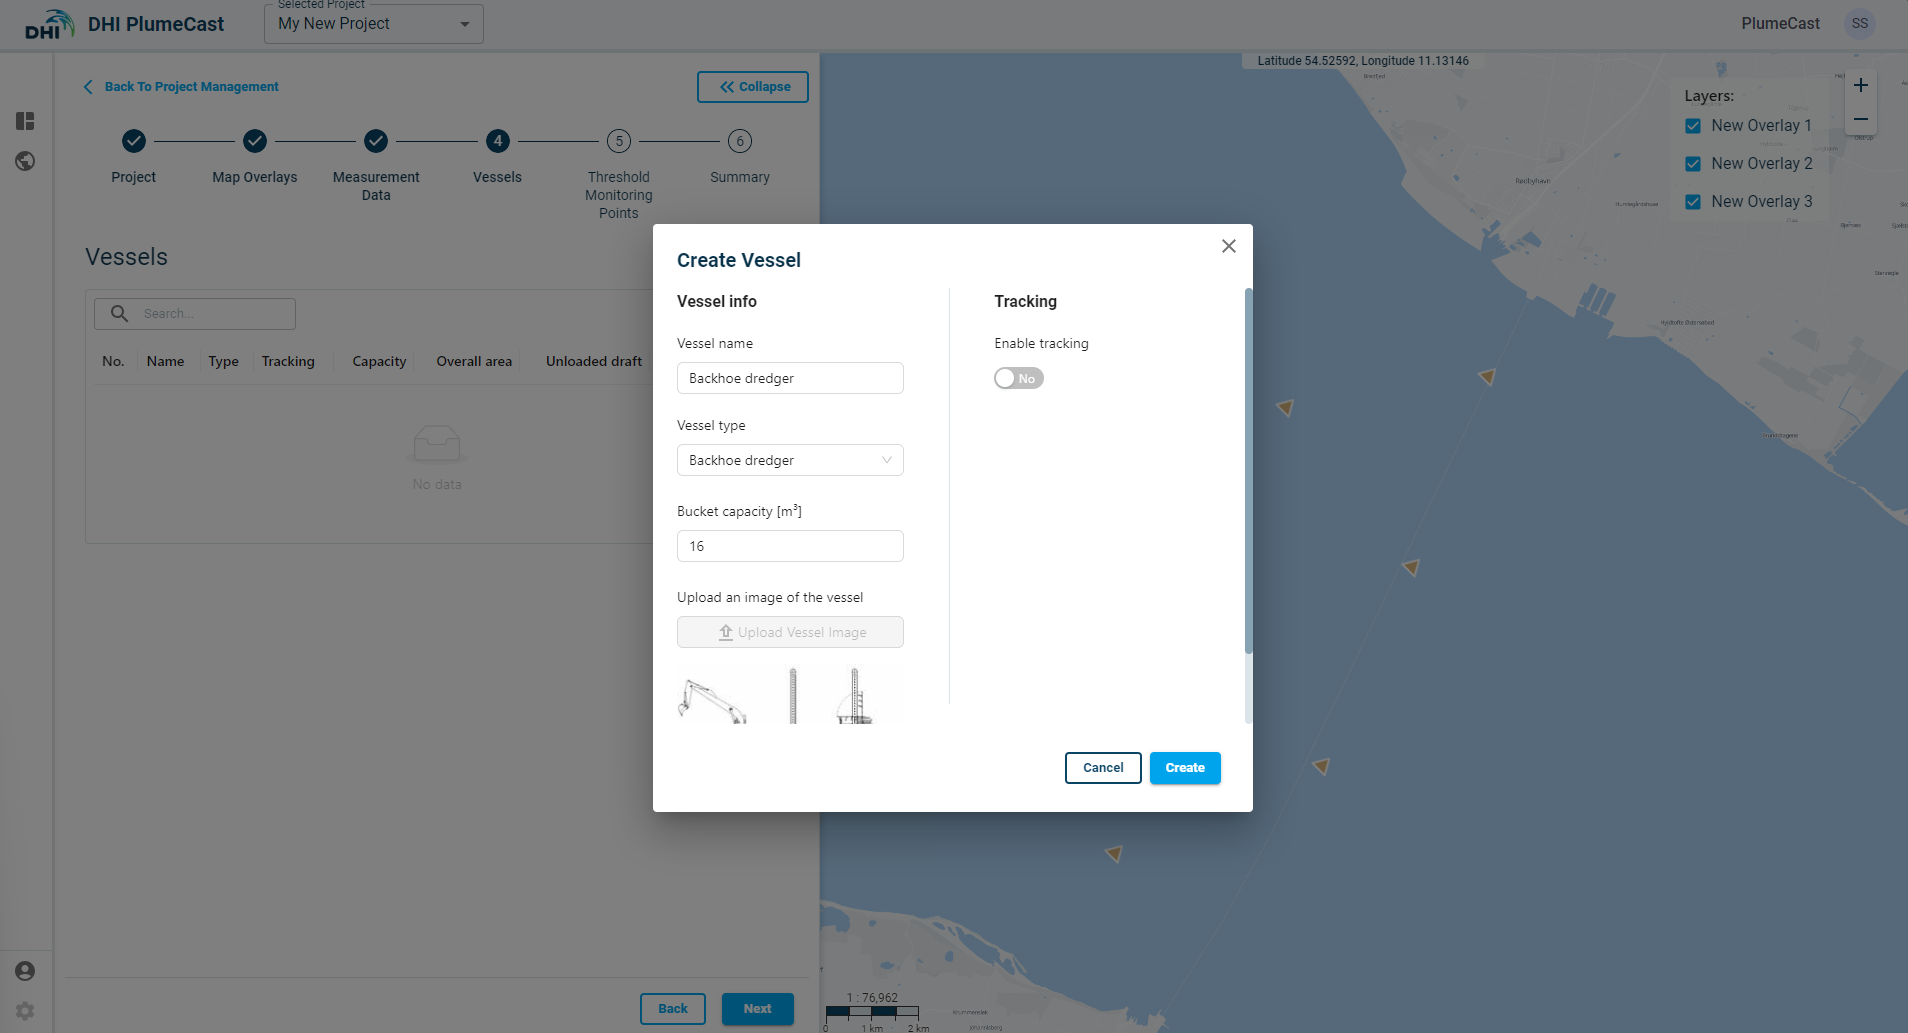
Give a name to the vessel, then choose the vessel type from the drop-down list. The default types of vessels available are:
- Backhoe dredger
- Grab dredger
- TSHD (Training Suction Hopper Dredger)
- CSD (Cutter Suction Dredger)
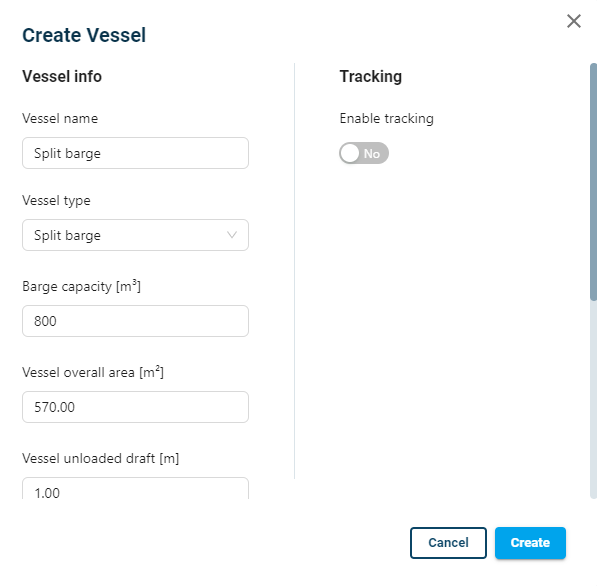
- Split Barge
- Water Injection
- Tugboat
- Other
Other types can be added upon client’s request.
You can provide extra information such as grab capacity or hopper capacity for different types of the vessels. The vessel types are primarily used for identifying the type of spill that need to be given to the MIKE model.
‘Split Barge’ requires extra information which is used for the nearfield calculator in MIKE for simulating the disposal plume.
Only ‘Split Barge’ type is valid for using in the Disposal section of the scenario.
If using DHI PlumeCast in Operational mode, you can use the tracking feature for vessels, by activating it when defining the vessel.
You must choose the Vessel ID which corresponds to the Vessel you are about to define in your project. The Vessel ID is set-up and provided by DHI PlumeCast administrators. For editing and/or adding vessels to this list, you shall contact your PlumeCast support contact person. You can then assign an icon for the vessel (to be visualized on the map), a colour, and size.
![]()
Threshold Monitoring Points
Only active with Live Data access.
Summary
Here you will see a summary of all features added to your project.
You can finalise the project definition by clicking on ‘Finish’ button. You will be redirected to the Project Management Page, where you see an overview of all your projects:
