“Well Manager”: Create and run a new model scenario
With MIKE Mine you can create your own model scenarios, based on existing model scenarios. This includes adding new well locations, changing pumping rates of existing wells and deleting existing well locations. This guide shows how to create a new model scenario.
| Instruction | Screen |
|---|---|
| Open the Well Manager application, either by selecting it in the home view or by using the navigation panel. | 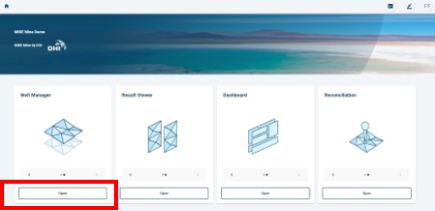 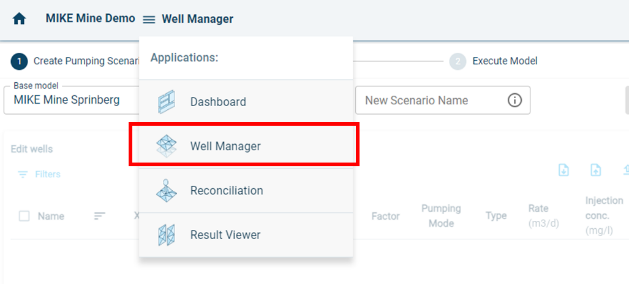 |
| You can switch between the two different view panels – “Create Pumping Scenario” and “Execute Model” – in the second level navigation pane. | 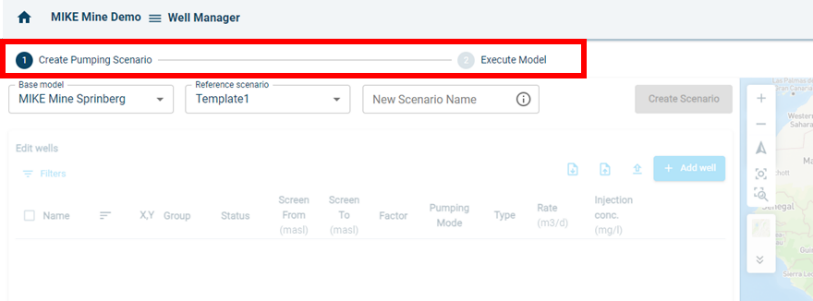 |
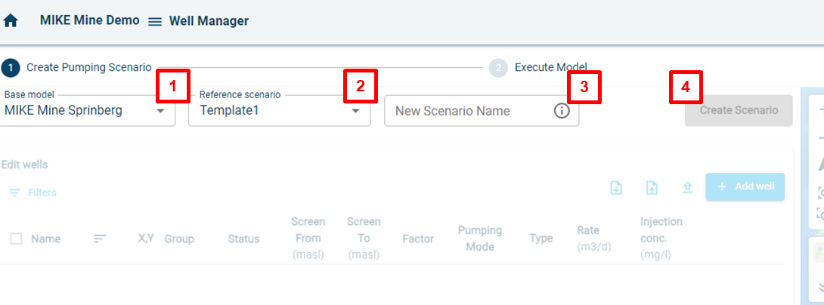
| On the landing page of the Well Manager, follow the below steps to create a new scenario. 1. Select a base model. 2. Select a reference scenario. This could be the original template scenario or a previously created scenario. 3. Enter a name for the new scenario. Please follow your internal naming convention to avoid confusion. 4. Click on “Create Scenario”. This will create a new scenario. A window will appear with a loading message. |
 |
| The model scenario is now ready to be edited. To add a new well to the model scenario, follow these steps: 1. Click on “Add Well”. You now enter the “Add Well” mode. This is indicated by a change of the “Add Well” button. 2. You can now click on a location on the map to add a new well location. 3. A new row in the well table will be added. In here you can change the well name, the type of well, the screen depth, the pumping mode and the pumping rate. You need to enter values for all fields. 4. You can apply the changes by clicking on the checkmark. If you want to discard your added well, click on the X. 5. A new well is now part of the well table. Alternatively, you can use the download and upload table functions, situated next to the “Add well” button. This way you can make changes using a csv-file, e.g. to add multiple wells. |
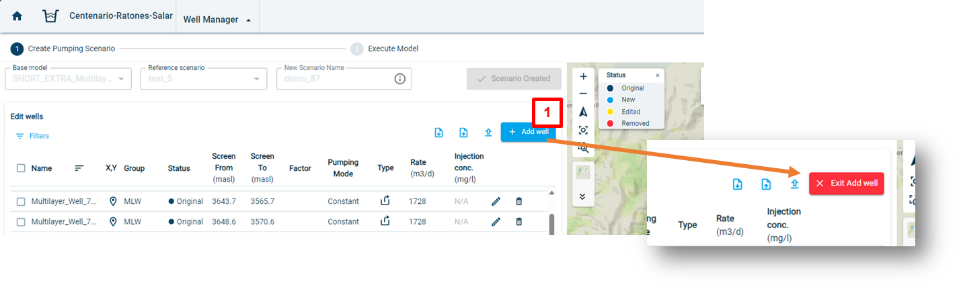 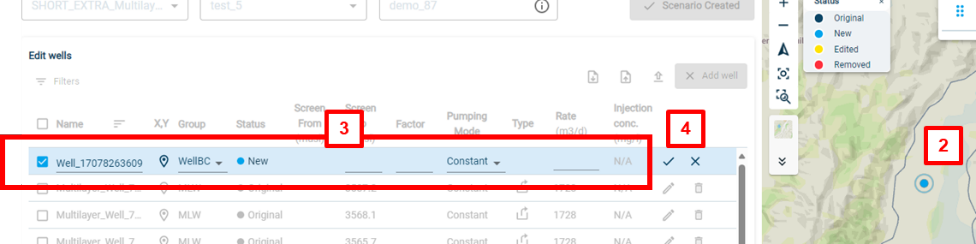  |
| A description of table headers of the well table is given on the right. | • Name: Name of well. Can be changed in the edit mode. • X,Y: Shows the coordinates of the well locations. • Status: Shows the edit status of a well. It can be: “New”, “Original”, “Edited” and “Removed”. • Screen From: This column is only active for Multlayer Wells. The value is entered as meters above sea level for the top of the screen. • Screen To: This column is active for WellBC and Multilayer Well. It represents the bottom of the well, or the bottom of the screen. The value is entered as meters above sea level. • Factor: The user can assign a factor to the pumping rate. Meaning that a factor of e.g. 0.5 would half the pumping rate for each well that has the factor shown in the column. • Pumping Mode: The pumping mode can be changed between “Constant” and “Variable”. For “Constant” one value is assigned. This value will be pumped by the well. For “Variable” a timeseries is assigned. The pumping rate can therefore change over time. • Pumping Mode: This shows if the well is pumping, injecting or puming and injecting. Pumping and injecting is only available for wells that have variable pumping rates. • Rate (m3/d): This is the pumping rate. The unit is m3/d. Postive values lead to pumping out of the groundwater. Negative values lead to a injection of water into the groundwater. • Injection conc. (mg/l): This column is only active if the well is a injeciton well. The user can then assign a concentration rate of the water which is injected into the groundwater. • Pen: This is the edit mode, to edit the value of each row or column. • Trash Can: This will delete the row and therefore the well. |
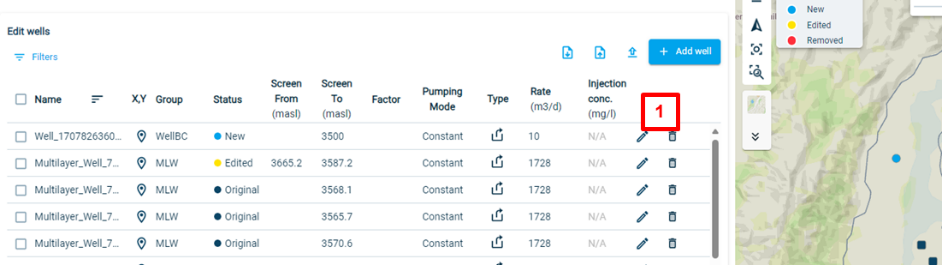
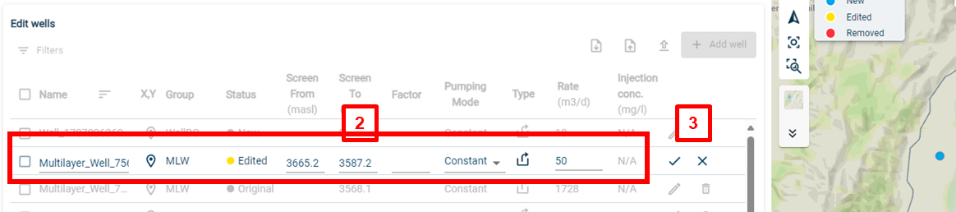
| To edit an existing well, follow these steps: 1. Click on the edit icon (pen) of the well you would like to edit. 2. The row is now in edit mode. You can now make your changes to the well parameters. E.g. change the pumping rate to 50. 3. To apply the changes, click on the checkmark. To discard the changes, click on the X. Your changes have now been saved. The edited well is now marked as yellow on the map and the status changed to “Edited”. |
   |
| To delete an existing well follow these steps: 1. Click on the delete button in the well table. A pop-up window will ask you if you really want to delete this well. Click ok to delete the well. The deleted well will be marked in red on the map. You have the option to revert the deletion by clicking on the red back arrow, which has replaced the bin icon. To delete multiple wells at the same time, follow the below steps: 2. Select multiple wells in the well table. 3. Click on “Delete selected” on the bottom of the well table. A pop-up window will ask you if you really want to delete this well. Click ok to delete the well. The deleted well will be marked in red on the map. |
 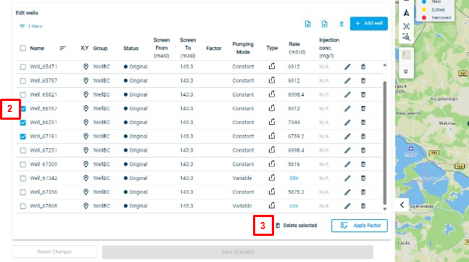 |
| To apply a factor to the pumping rates, follow the below steps: | 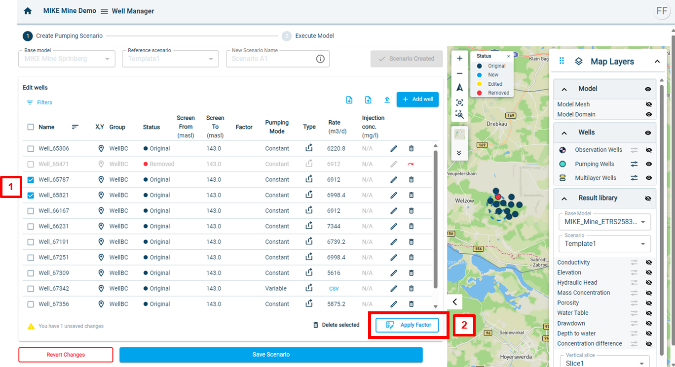 |
| It is possible to show model results of previous model scenarios. To visualise them, follow the below steps: | 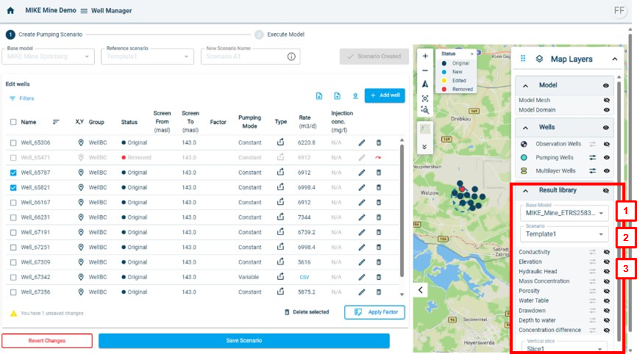 |
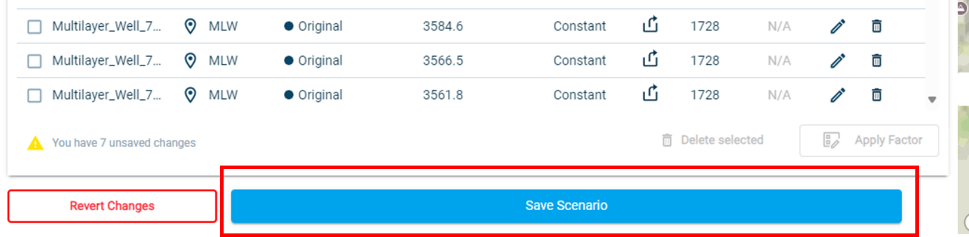
| Revert all changes. If you want to revert the changes that you made to the new model scenario you can use the “Revert Changes” button on the bottom left. This will set the well table back to the original state. | 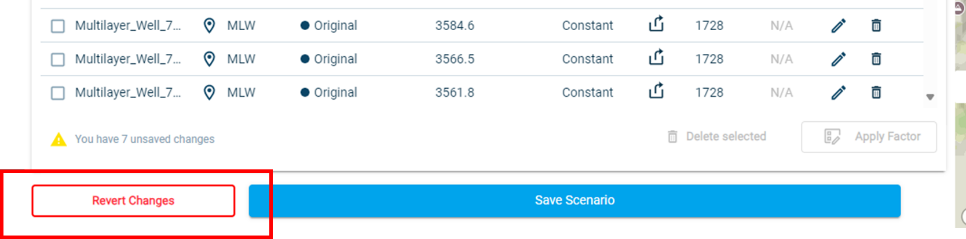 |
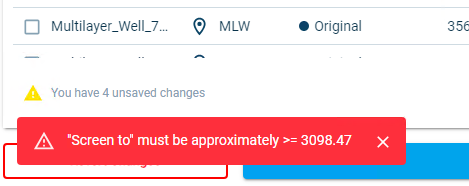
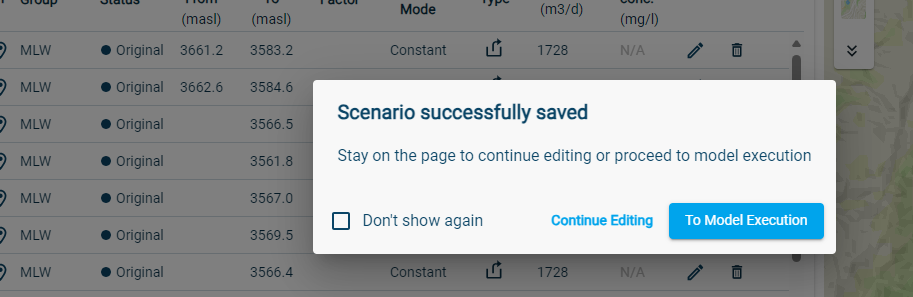
| To save the changes to your scenario and finalise the scenario creation, click on “Save Scenario” located at the bottom of the well table. A loading window will appear. Depending on the model size the saving can take up to a few minutes. During the saving process, general sense checks will be undertaken. If certain parameters are not valid, a red warning will be shown on the bottom left screen. After saving is complete, a window will appear. In this window you can choose to continue editing, which will allow you to make further changes. Or you finish the model scenario creation by clicking on “To Model Execution”. This will lead you to the model execution page, where you can start the model simulation (see next step). |
   |
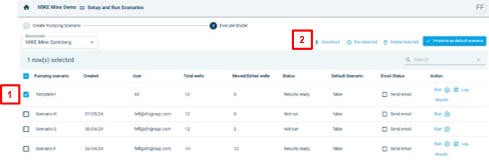
| To execute a model scenario simulation, follow the below steps: 1. Go to the “Execute Model” page. You either automatically enter this page after the step above. Or you can use the navigation pane (see button marked with 1 in screenshot). 2. Go to your scenario. You can choose the option to receive an Email once the model execution has completed. 3. To start the simulation click on run. The status of the model scenario will change to “Starting” or “Pending”. You can follow the progress of the model simulation, as the “Run” button will change to a progress bar and later on to “Postprocessing”. |
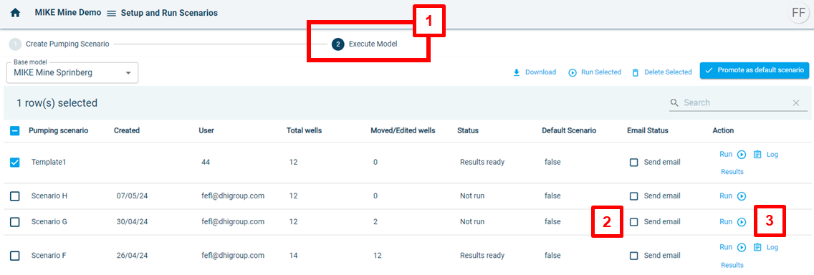 The meanings of the different statuses are: • Not run: The model has not yet been simulated. Results for this model are not available. • Results ready: The model has been simulated and results are available. • Simulation failed: The simulation has failed. You can check the log to investigate the cause. Or you can contact the administrator. • Starting: The model is being prepared to run. • Pending: The model is in the simulation queue waiting for other models to complete. |
| To download model files, follow these steps: 1. Select a model scenario 2. Click on “Download” |
 |
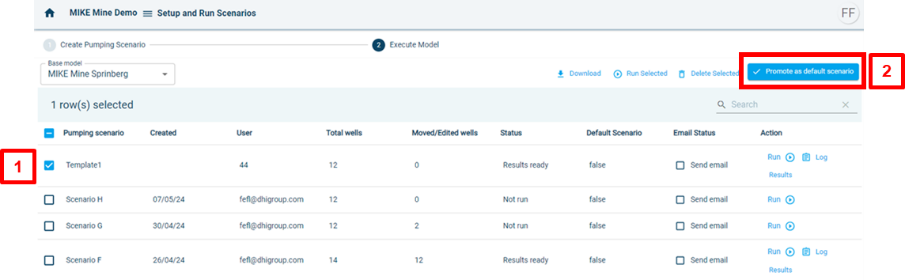
| Promote a model scenario to be the default scenario, follow the below steps: 1. Select a model scenario 2. Click on “Promote as default scenario” |
 |