Data Link layout
The interface of Data Link consists of several areas:
- Top bar,
- Map area,
- Layer manager,
- Left-side toolbar with buttons for map navigation and
- Right-side icons for panel dialogs as the key user interface (UI) components.
The DL layout is presented in Figure 3 below, and the UI components are further described in the following sections. If you want to get started on using DL, see Using Mesh import Using Mesh import.
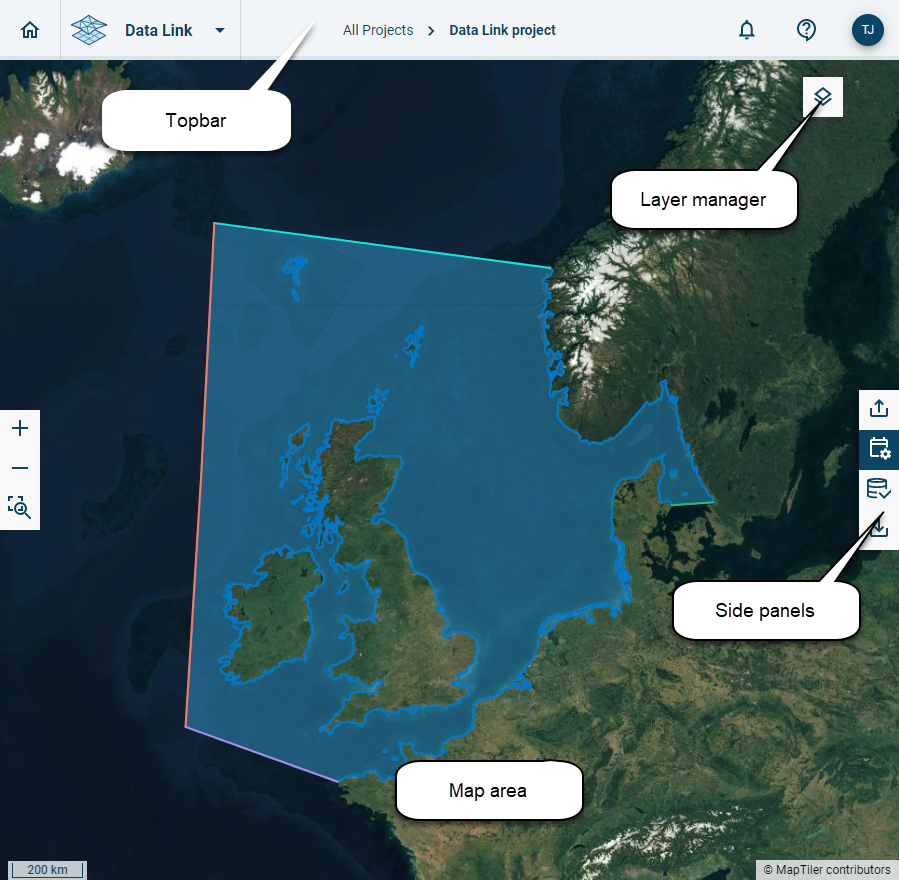
Figure 3 Data Link workspace with indication of main UI components. The figure includes an example of an imported model mesh (blue polygon area).
Top bar
The application top bar includes generic functionality for DHI cloud applications including navigation between the Cloud applications as well as icons for help and user details.

Figure 4 Data Link top bar
Top bar features: - Home: Direct link to the DHI cloud home page. You leave the current (DL) application. - App selector: Drop down list with your Cloud applications; if you click a new application, it opens in the same project you are in and opens in a new tab. - Navigation Breadcrumb: click on a link to navigate between folders inside DL. - Right side Icons for Notifications, Help & support and user log out option.
Map area
The map area is the central component for visualisation, this includes: - data grids for external data providers - model domains and - model meshes.
It does not include any options for editing or modifying data graphically.
Layer manager
The Layer manager enables different visualisations on the map. Some of these will only work once a .mesh file is uploaded.
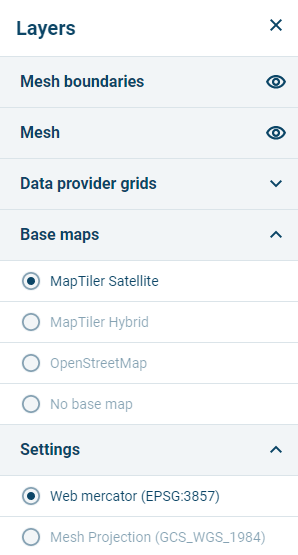
The following options are available:
- Mesh boundaries: view/hide the extracted boundaries of the mesh (only works if a mesh was uploaded)
- Mesh: view/hide the mesh (only works if a mesh was uploaded)
- Data provider grids: view/hide the grid covered by the data provider in the area of the mesh (only works if a mesh was uploaded and if there is data coverage in the area)
- Base maps: switch the background map to the selected map / no map (does not need mesh upload)
- Settings: view the project in the default projection system (EPSG:3857) or choose to see it in the projection system of the mesh (only works if a mesh was uploaded)
Left-side toolbar for zooming
The left-side toolbar has three functions:
- ![]()
![]() these buttons will let you zoom in and out to the area you are viewing
-
these buttons will let you zoom in and out to the area you are viewing
- ![]() this button will let you zoom to the extent of the mesh, meaning you get the whole mesh in frame (only works if a mesh was uploaded).
this button will let you zoom to the extent of the mesh, meaning you get the whole mesh in frame (only works if a mesh was uploaded).
Right-side toolbar and panels
All user interaction, file handling and parameter definitions for data extraction in Data Link are done via the use of panels. Panels will open and close when clicking the specific icons in the right-side toolbar.
There are four panels for:
- import of a mesh-file ![]() ,
- data extraction settings
,
- data extraction settings ![]() ,
- data (item) selection
,
- data (item) selection ![]() and
- export
and
- export ![]() .
.
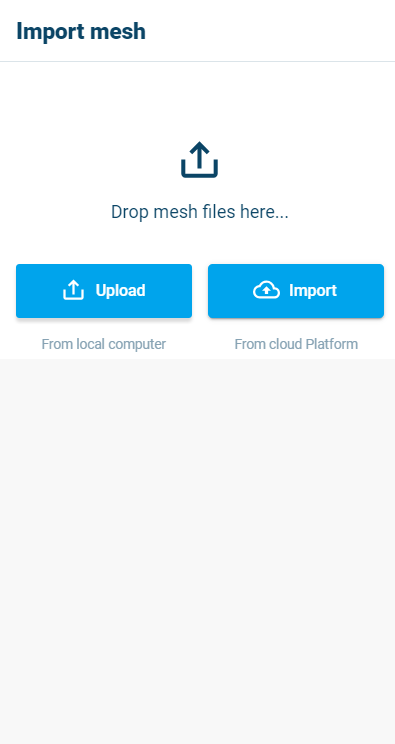
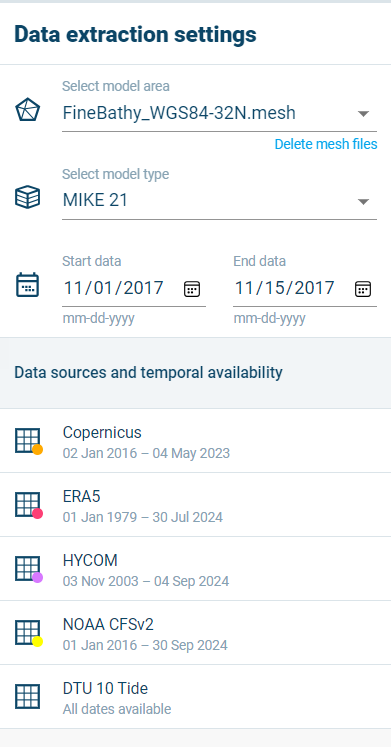
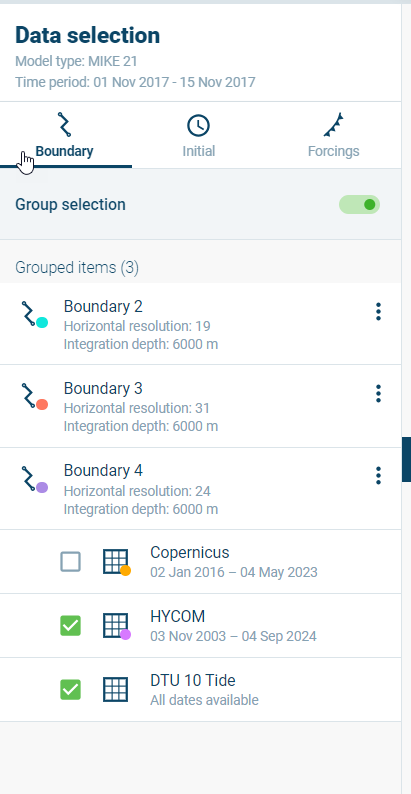
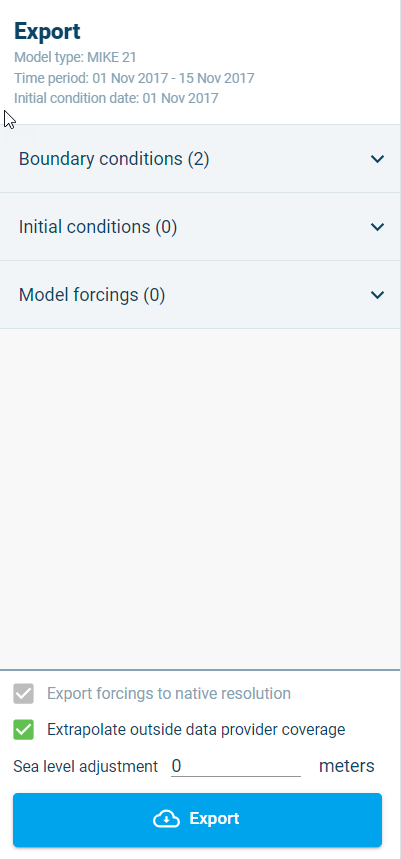
Figure 5 Data Link side panels.
Read more about the functionality in each panel in the following chapters.