MIKE Mine
Introduction
Purpose of this User Guide
In this user guide, you will learn how to navigate through the MIKE Mine web platform.
Disclaimer: The model and data used for this user guide does not reflect the reality. The location of the arbitrary model and data was chosen randomly. The model and data were solely created for training purposes.
Introducing MIKE Mine
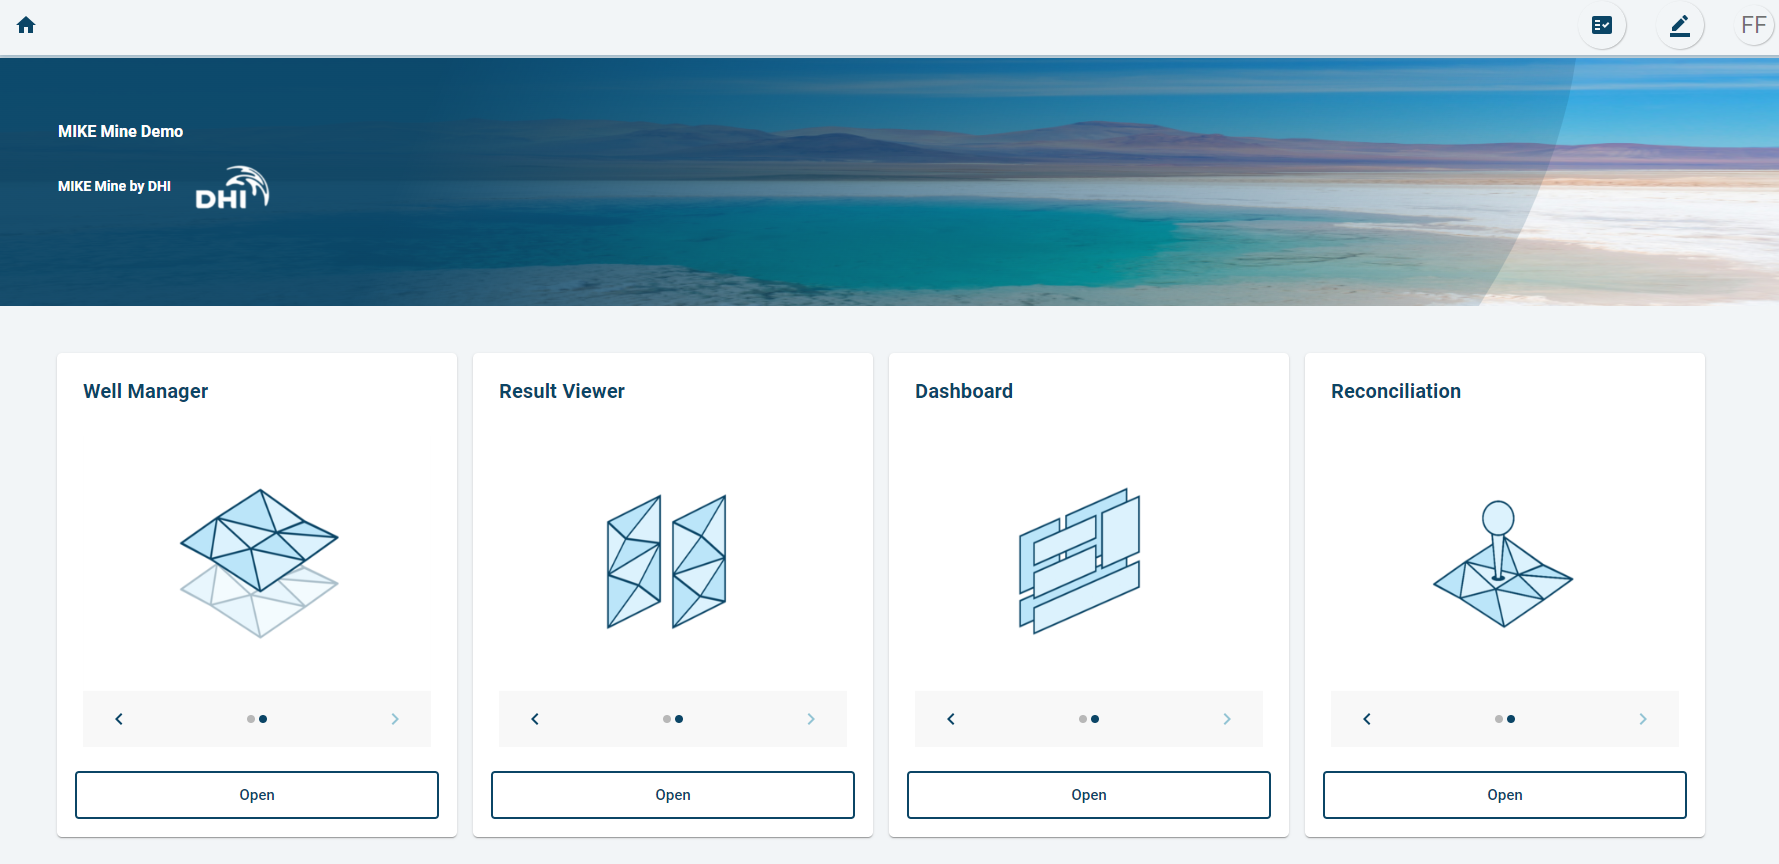
MIKE Mine is a web user interface (web UI) and is designed for the daily operational use regarding the underlying FEFLOW groundwater model and dissemination of results to relevant stakeholders. MIKE Mine is hosted on the Microsoft Azure cloud environment. Data is stored on a centralized PostgreSQL database. The environment also includes a virtual machine on which two software packages are installed, which are used to interact with data and models: MIKE Operations – which is the operational software interacting with the database and FEFLOW – to simulate the groundwater models. The MIKE Mine web UI consist of a REST API developed using ASP.NET Core and frontend components developed using the React framework. The MIKE Mine web UI consists of different standalone features, which are listed and described below. Further features are under development and will be part of future releases. Features can also be developed for or with clients, to address individual needs.
-
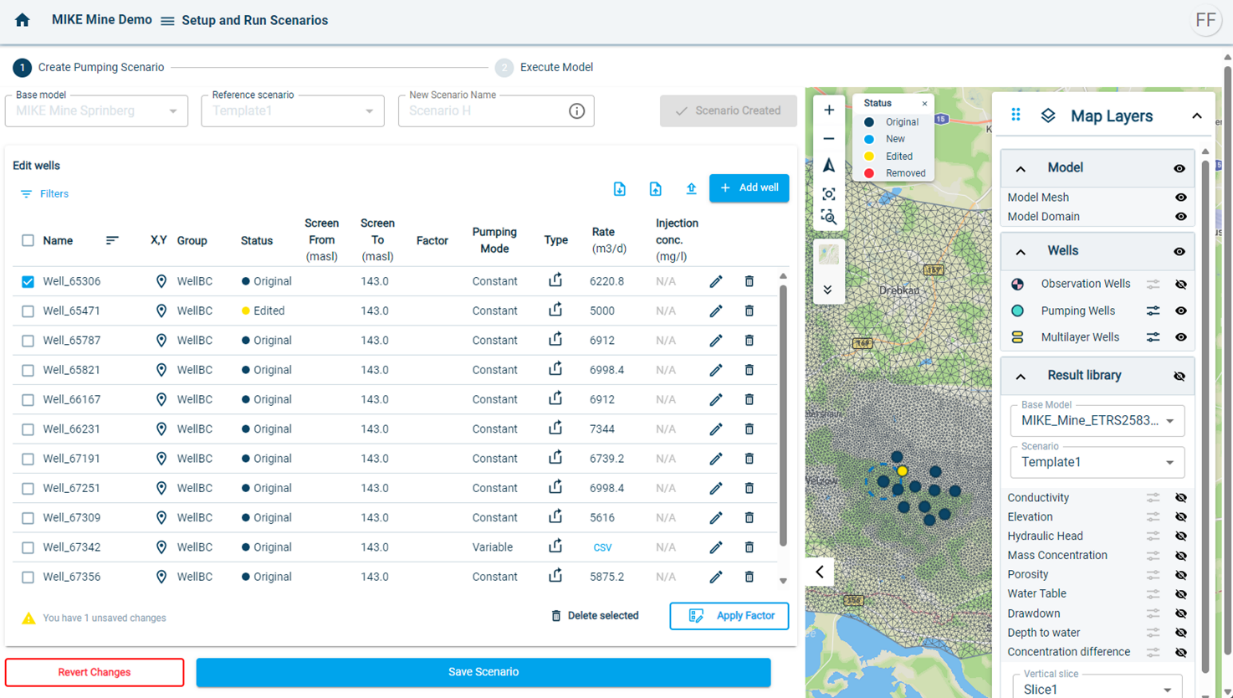
Well Manager
The Well Manager allows the user to create, configure and run model scenarios. The steps are choosing a base model, choosing a base scenario, naming and creating a new scenario, adding new wells or deleting existing wells or changing pumping rates, saving the new scenario, running the simulation of the new scenario. -
Result Viewer
The Result Viewer is a map-based application which allows the user to view and compare model scenario results and parameters. Comparing model scenarios can be done using three different methods: plan view, cross section view or timeseries view. Comparable data includes e.g. water levels, concentration, drawdown, elevation, depth to water and others. -
Dashboard
The Dashboard view allows the user to prepare customized dashboards with results of locations, observations and forecasts of the FEFLOW groundwater model. Dashboards can be shared with colleagues and superiors for review and administrators can decide to publish and share a dashboard with relevant stakeholders. -
Reconciliation
The Reconciliation feature is a map-based feature which allows the user to view data in different ways. This includes measured data as well as modelled data. Data can be viewed in graph or table view. -
Data Management
The Data Management feature allows users to input, edit, and manage their own data sets, which will seamlessly integrate with the Reconciliation feature. Users can upload new data, modify existing entries, and organize data to ensure accuracy and consistency. The changes made in the Data Management app will automatically reflect in the Reconciliation app.
Login to MIKE Mine
MIKE Mine is accessible via the following link: https://waterdss-wrd-prod.eu.mike-cloud.com/
For full access to MIKE Mine, follow the steps below.
| Instruction | Screen |
|---|---|
| New users will be given access to MIKE Mine via the MIKE Cloud platform. This is done by the administrator. To access MIKE Cloud interface, use the following link: https://dataadmin.mike-cloud.com/site | 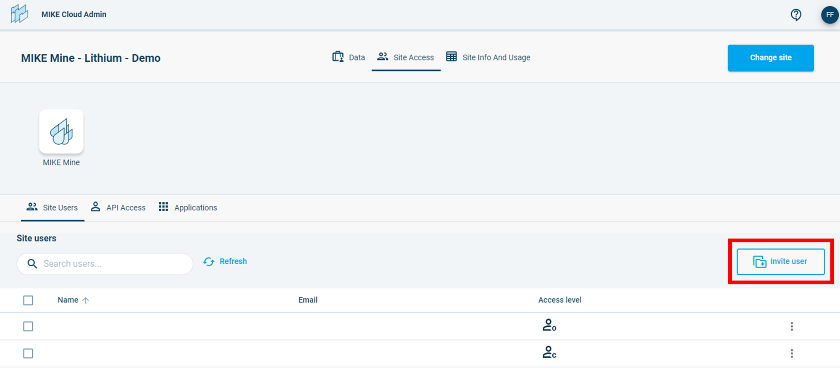 |
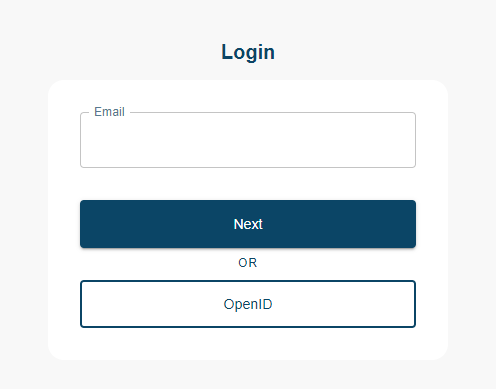
| Once a user has been invited, the user will receive an Email from MIKE Cloud. Please follow the instructions in the Email to complete the registration. | |
| After the registration is completed, you can access MIKE Mine at: https://waterdss-wrd-prod.eu.mike-cloud.com/ Click on “OpenID” and follow your personal login (e.g. via Authenticator App). |
 |
| A new window will open called “Pick your site context”. In this window, please choose the tenant that you want to enter. The name of the tenant is often the name of your company. |  |
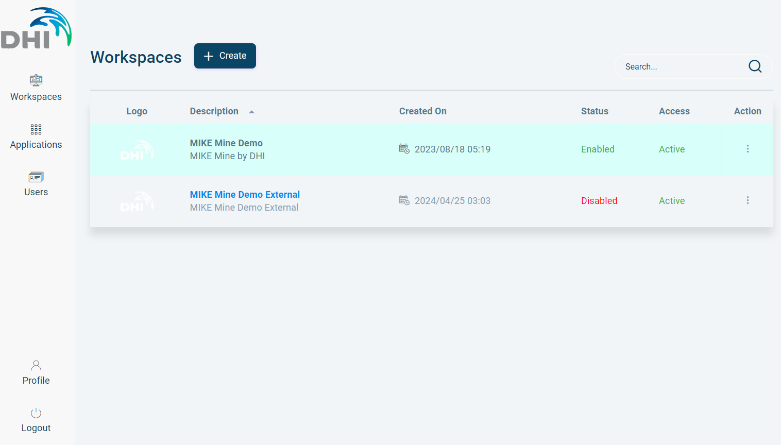
| You can now enter the workspace for your project site by clicking on the available workspace. It is possible to have multiple workspaces in one tenant. Choose the workspace. To logout, use the “Logout” button on the bottom left. |
 |
| After entering the workspace of your project site, you can now choose one of the applications. The available applications will depend on your license. To open one of the applications, click on “Open”. |
 |
| Once you are in one of the applications, you can navigate between the application via the “Navigation Pane” or by clicking on the “Home” button. |  |