Exporting
After the .mesh file has been uploaded, the data extraction settings have been chosen, and the data selection has been done, open the Export panel by clicking the fourth symbol from the top on the right: ![]() . A new panel is opened:
. A new panel is opened:
The Export panel in DL serves two purposes:
- It allows you to validate the data extraction specifications you have made in the process up until now and
- Allows you to export the file.
Depending on the resolution of the input mesh, data provider and time period selections, data extractions may be quite time consuming, and it is therefore recommended to ensure that all selections are correct before the processing and extraction of data is started.
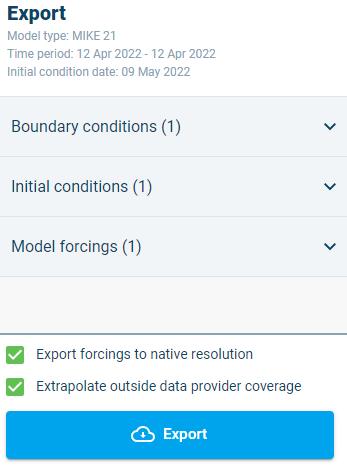
Summary of data query selections
The upper section of the Export panel as presents a summary of the user selections such as; model type, data extraction period and selected date for initial conditions data.
The drop-down lists present the summary of selected data providers for model boundaries, initial conditions, and model forcings respectively. It is recommended to open the lists (click the arrow down symbols) and verify that selections are correct.
The summary is primarily intended to provide an option for the user to verify that all selections are correct and as desired prior to executing a data extraction.
Export forcings to native resolution
The ‘Export forcings to native resolution’ tick-mark enables you to control the output resolution when extracting meteorological model forcing variables from Data Link.
Activating the tick-mark (default option) will extract and store model forcings data to an output file with a grid resolution identical to the resolution of the specific native data provider dataset (e.g. 0.2 deg resolution for NOAA CFSv2).
De-activating the tick-mark will create an output file with values interpolated on the the original model mesh file. Note, that the latter option naturally provide a much finer resolution of the output but the size of extraction files will also grow tremendously and undesirable big files may be a result of that.
The figure below presents an example of extraction of Air temperature to a native resolution of the data provider (NOAA GFS).
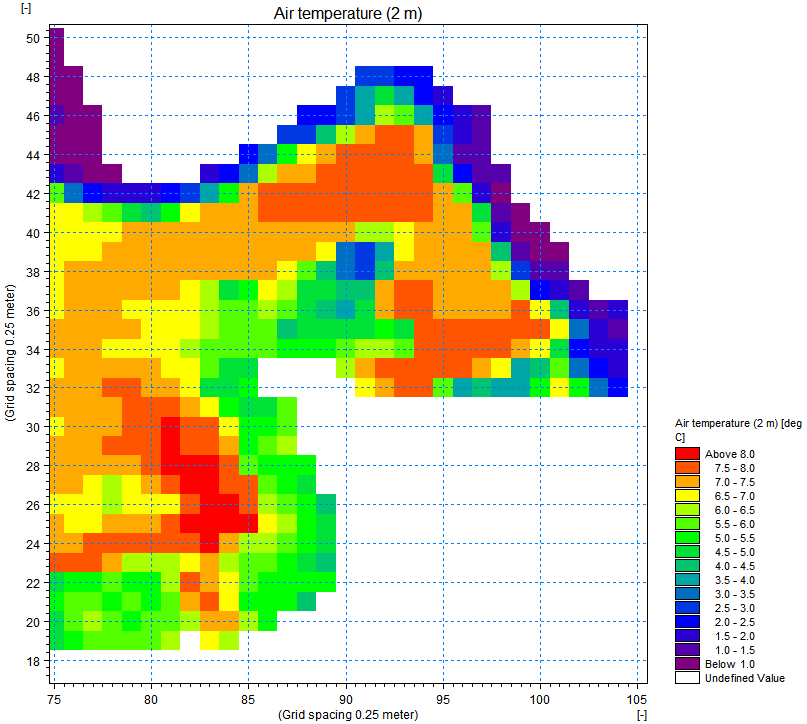
Extraction of Forcings to native data provider grid resolution.
The figure blow presents an example of extraction where forcings data (Air Temperature) has been interpolated on to the selected model mesh-file.
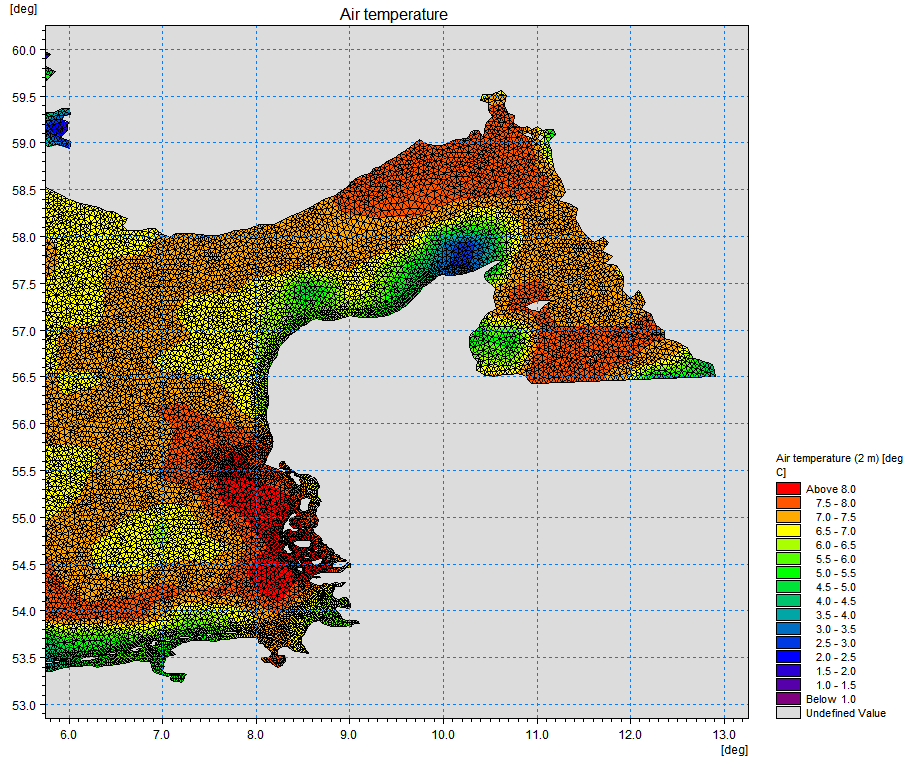
Extraction of forcings to model mesh resolution.
Extrapolate outside data provider coverage
The ‘Export outside data provider coverage’ tick-mark enable you to select if you want DL to extrapolate values in areas, where the model mesh extend beyond the spatial coverage of data from the selected data provider.
This option has an effect only on extractions of Boundary condition data and Initial condition data.
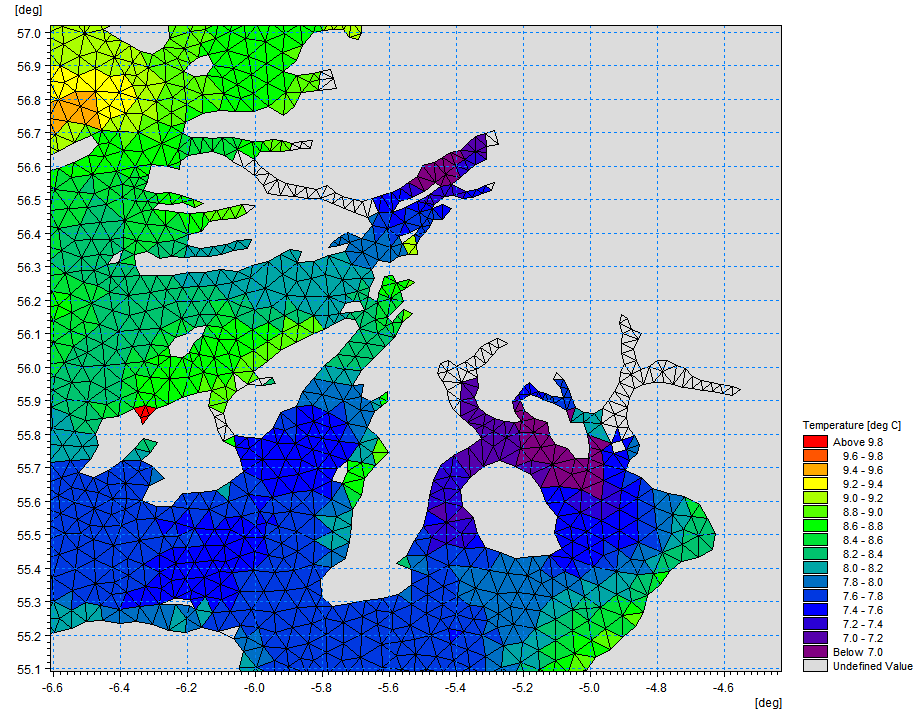
Activating the tick-mark (default option) will activate the extrapolation and thereby secure that values are exported for all elements in the model mesh (see figure below).
Data Extraction including extrapolation of values outside data provider spatial coverage. Result is that all elements has a well-defined value.
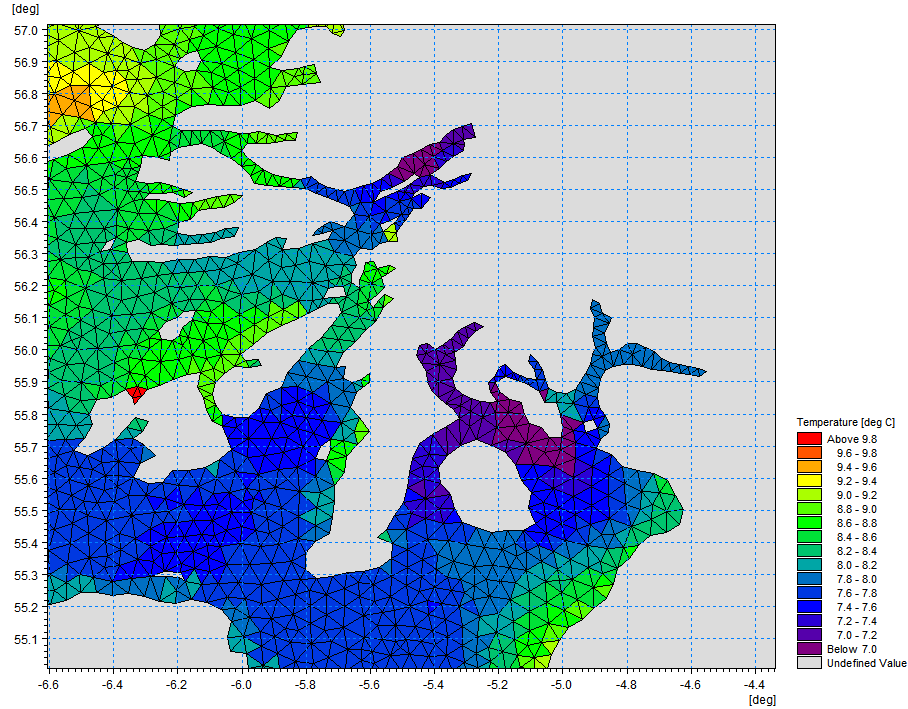
Deactivating the tick-mark can result in mesh-elements with no values following the data extraction processing (see figure below).
Data Extraction excluding extrapolation of values outside data provider spatial coverage. Results in some elements having an undefined value.
Export
Once all selections are verified, press ‘Export’ to start the data extraction.
A pop-up dialog for defining the location of output from the extraction will appear. A file location within the active project must be selected and extractions can be stored either in the root of the current project or in a sub-folder. If sub-folders do not exist in the project, a message ‘No content yet’ appear as presented in the figure below. Press Export from the dialog to continue the data extraction processes and the output will be stored in the selected location.

Pop-up dialog for selecting the folder location for MIKE Data Link extraction
During execution of data extraction in DL, a spinning wheel progress indicator is visible in the application top-bar. Clicking the spinning wheel icon will open an info dialog with brief information on the progress of the extraction processing (see figure below).
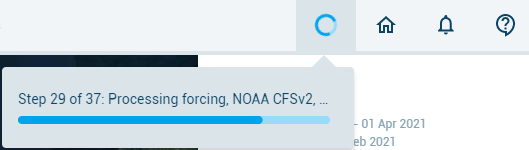
Top-bar progress indicators available during data extraction.
Data Link output content and location
Depending on the number of boundaries in the mesh-file and selections in DL of data providers and data items, the output from the extraction will consist of a varying number of output files. All files produced during extraction are automatically stored in a compressed archive Zip-file to simplify the handling of output from multiple data extractions.
Output files from Data Link extractions are stored with a default naming convention; ‘Extraction Date-Time.zip’ (e.g. “Extraction 20210907-1224.zip”).
To access the extraction file, it is required to open MIKE Data Admin and navigate to the active project-folder. Pressing the ‘MIKE Cloud Home’ icon in the top-bar from DL will open MIKE Data Admin in the active folder directly, and the extraction Zip-file can be edited (change of file-name and description) and downloaded to local disc from here.
Note: when downloading a zip-file to local disc from MIKE Data Admin, always select ‘Download as-is’ – do not select the change or convert option.
Summary log-file from data extraction
A log-file is produced from every data extraction session and stored in the foot of the data extraction output Zip-archive. The log-file is an ASCII text-file with the name; ‘Extraction-info.txt’.
The log-file include detailed information from the actual data extraction such as: - Date of data extracted - Name of mesh input file (including geographical Projection) - Model type - Extraction period (start- and end-date) - List of selected data items for extraction - Boundary data information: Horizontal and vertical resolution and data sources - Initial conditions information: Start date, Data items and data sources - Model forcing: Data items and data sources - Long list of all folders and files included in the extraction zip-file.
Model input files
The data extraction of DL currently produces model input for files for MIKE 21 and/or MIKE 3 FM models and the extraction files are stored in file-formates applied by MIKE models (dfs1-, dfs2- and dfsu-files).
Model input files from data extraction are stored in sub-folders in the zip-archive file with a folder for Boundary condition files, initial condition files and model forcings files (see Figure 3 14).
File names for model input files from the extraction follows the syntax: “Extraction period + data item + Location + Data provider name”
Note: when Tidal prediction (UTM-10) has been selected in combination with other Ocean data provider (Copernicus or HYCOM), DL will produce and store files both for the individual data provider as well as data where the two data-sets are combined (that is, tidal contribution is added to Copernicus and HYCOM data respectively). The files with combined data has a filename suffix of ‘Combined’ included in the output file name.
Examples are: - Boundary: “20210201_20210402_ssh_Bound_5_Copernicus.dfs1” - Boundary: “20210201_20210402_uv_Combined_Bound_5_Copernicus.dfsu” - Forcings: “20210201_20210402_Air temperature (2 m)_NOAA CFSv2.dfs2” - Initial Condition: “20210201_ssh_Copernicus.dfsu”

Zip archive-file content from extraction in MIKE Data Link including both Boundary conditions, Initial conditions as well as Model Forcings.