“Dashboard”
Create your own dashboard
You can create, save and share your own dashboard using the “Dashboard” application. This guide will explain the steps necessary to create your own dashboard.
| Instruction | Screen |
|---|---|
| Open the Dashboard, either by selecting it in the home view or by using the navigation panel. | 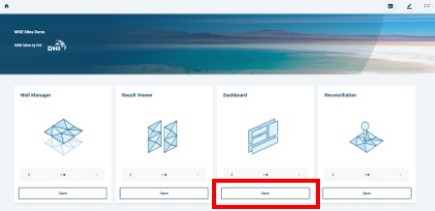 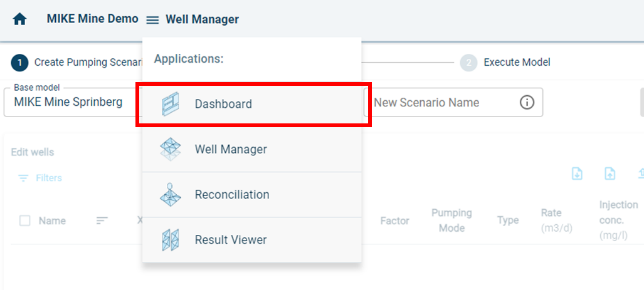 |
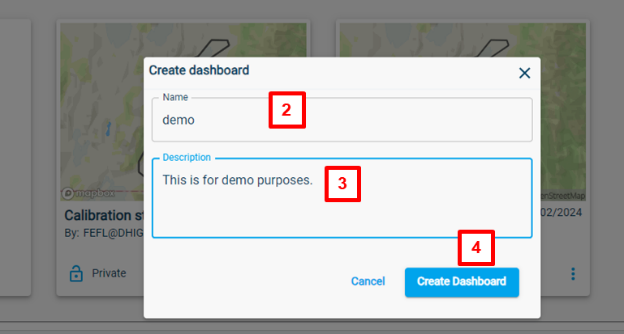
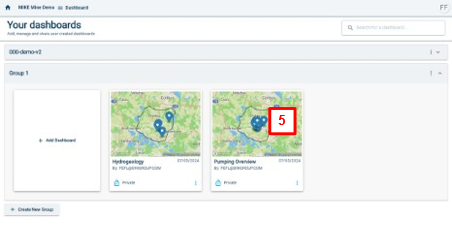
| To create a new dashboard, follow the below steps: 1. Click on “Add Dashboard”. There is also an option to create a new dashboard group. You can do this by clicking on “Create New Group” on the bottom of the page. 2. Enter a name for your dashboard. 3. Enter a description of your dashboard. 4. Click on “Create Dashboard” 5. You can now open your dashboard by clicking on your newly created dashboard. |
   |
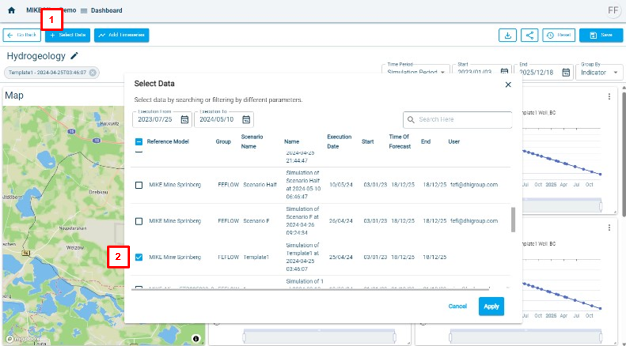
| To customize your dashboard, follow the below steps: 1. Click on “Select Data” to select the models or data you want to be available in the dashboard. 2. A window will open with all the measured and modelled data. Select the model or measured data you want to show. Click on “Apply” 3. Click on “Add Timeseries” to add the assets that you want to show in the dashboard. 4. Select the assets you want to show. 5. There is an option group the assets by data point. 6. There is also an option to search the table. 7. Click on apply to show the timeseries. |
 |
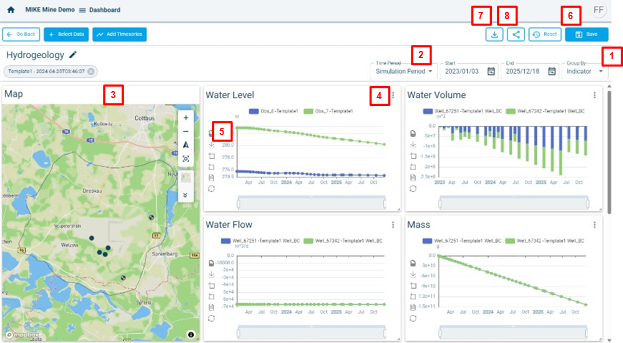
| To modify the dashboard visualisation, there are several options: 1. You can group the graphs by place, which is the asset, or by indicator, which are the different parameters. 2. There are several options to choose the time period which is displayed for the graphs. 3. You can drag and drop the windows to rearrange to your liking. You can also resize the windows to your liking. 4. The graphs have a settings panel, to choose different visualisation options for the graphs (e.g. line chart or bar chart). 5. There are further plotting options available (e.g. data view). 6. You can save your dashboard view by clicking on “Save”. If you don’t save, the views you have modified will not be saved. 7. To download the dashboard as png, click on the download button. 8. To share the dashboard via a link, click on the share option. Your colleagues can then open the link and view the dashboard. It is only a viewing option, no changes can be made to the dashboard by the invites. |
  |